This document describes how to command a motion to a position relative to a User Frame. This position could either be manually determined by the user or calculated automatically from CAD or Camera data. First, let us assume we have created a User Frame (#10) attached to a pallet as shown below.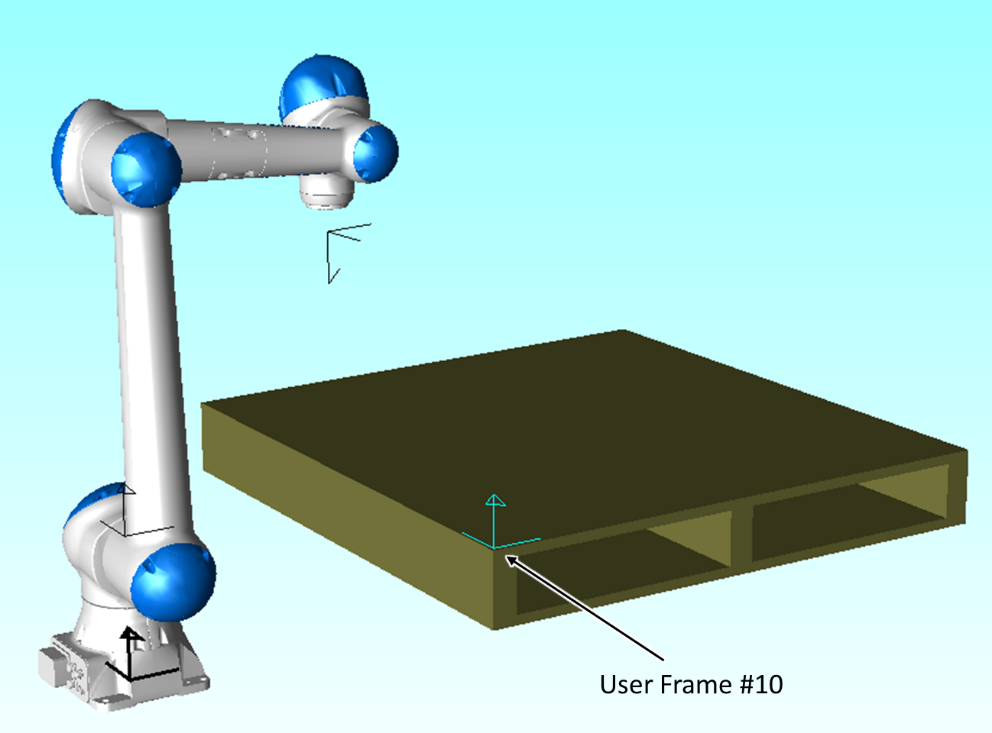
Now, a Position Variable can be created based on this User Frame. Select {MENU}, {Program/Operate} and then {Variables}. Then, follow these steps as labelled in the picture below:
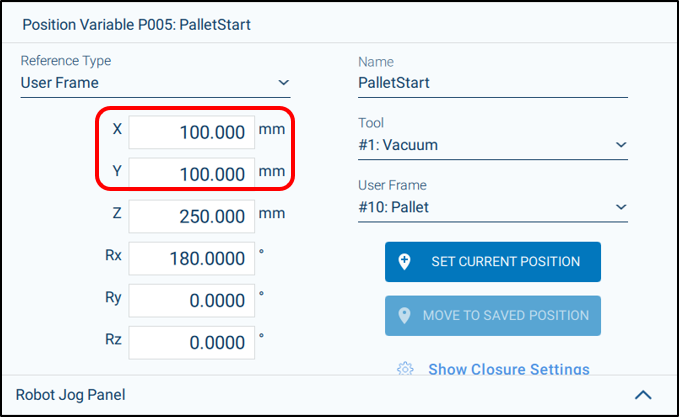
- Select the desired Position Variable. In this example, Position Variable 5 (P005) is used.
- Change the Reference Type to User Frame.
- Change the User Frame to the desired User Frame #. User Frame #10 is used in this example.
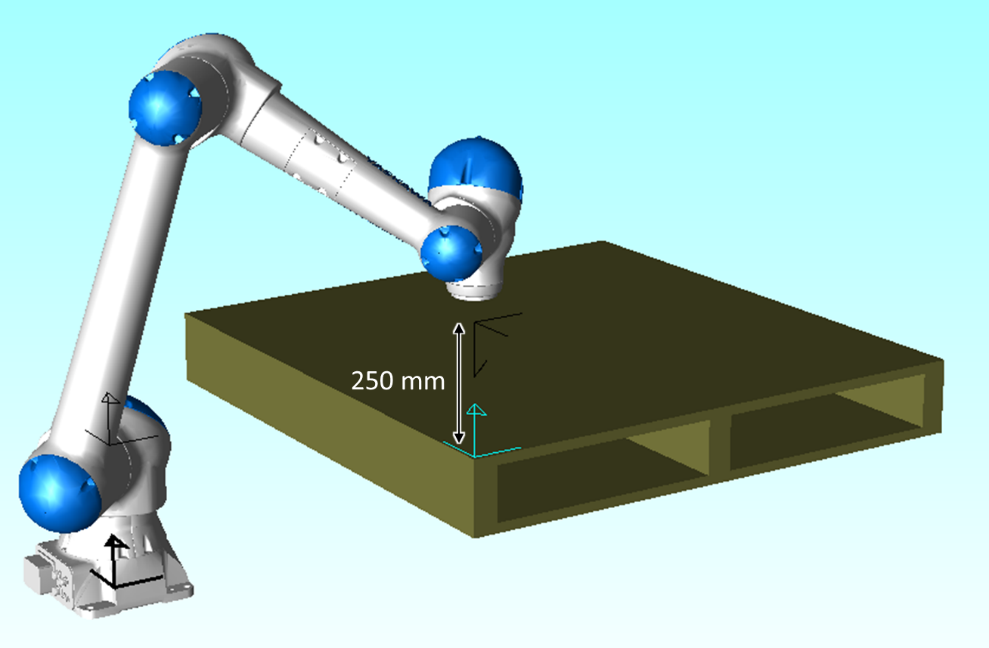
- Enter the desired Position relative to the User Frame. In this example, Z=250 mm is chosen so that the robot will move to a position 250 mm above the User Frame. Note that the Rx value of 180 is set because the Z axis of the Robot TCP and User Frame are pointing in opposite directions.

Now, press and hold the {MOVE TO SAVED POSITION} button and the robot will move to a position 250 mm above the User Frame as shown below.
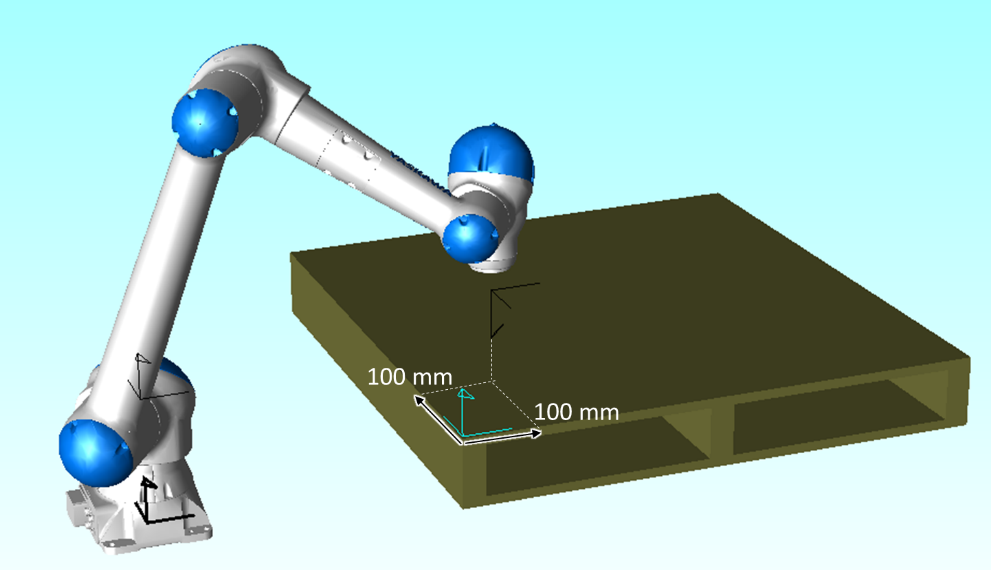
In practice, moving to the corner of a pallet is not often useful. Suppose that the first pick or place position was offset from the corner by 100mm in the X and Y directions. The Position Variable could then be modified as shown below:
Now, pressing and holding the {MOVE TO SAVED POSITION} button should move the robot to its new position:
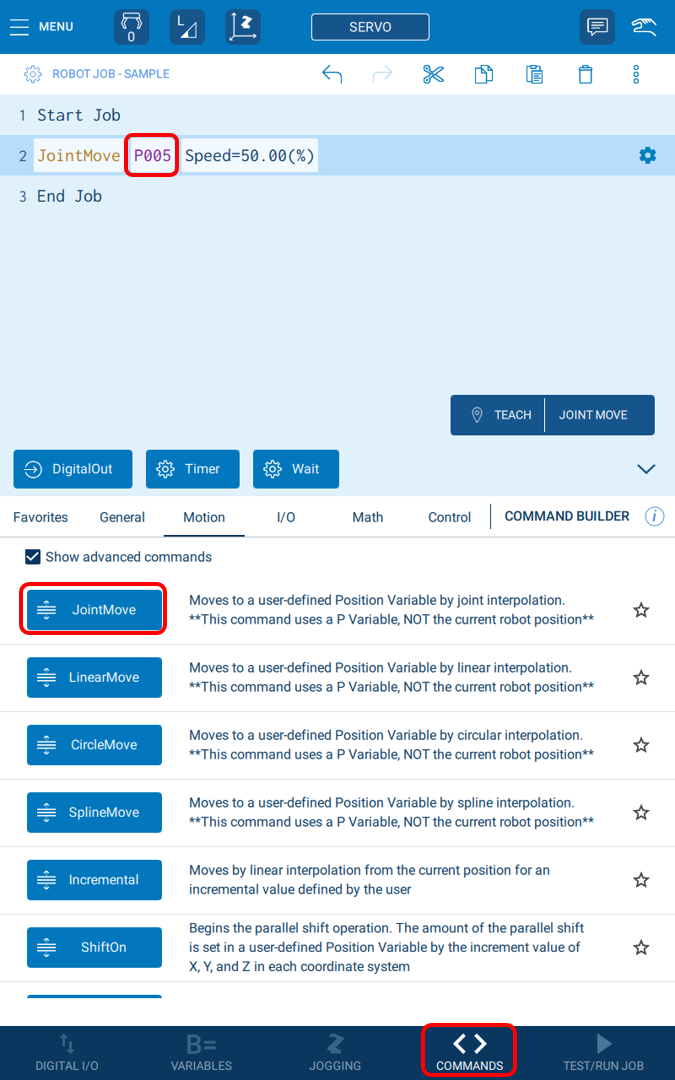
Now, a motion to this position can easily be added to a job. Open the desired job and select {COMMANDS} from the button navigation menu. Next, press {Motion} to open the motion commands and press the {JointMove} button (note: “Show advanced commands” must be checked for this command to be visible). Finally, change the Position Variable of the command to P005 as used before. Now, when this job is executed, the robot will move to the user-defined position.
Comments
0 comments
Please sign in to leave a comment.