Scope and Purpose
This document defines the standard procedure for replacing the I/O fuse inside of the YRC1000micro controller.
Materials
- Phillips head screwdriver
- Fuse
(The part number for HM10 fuse is 165188-1.)
(The part number for HM16 fuse is 165188-2.)
Process
- Disconnect power from controller and remove power cable.
- Remove the top cover of the micro controller. There are 10 screws total that need to be removed to gain access to the inside of the controller. If you have an HC10DT, there will be 14 total screws to remove from the cover. If you have an HC10DT with a PFL module, jump to section 3.6 for the next step.
- Remove the Fuse located at the top of the I/O board.
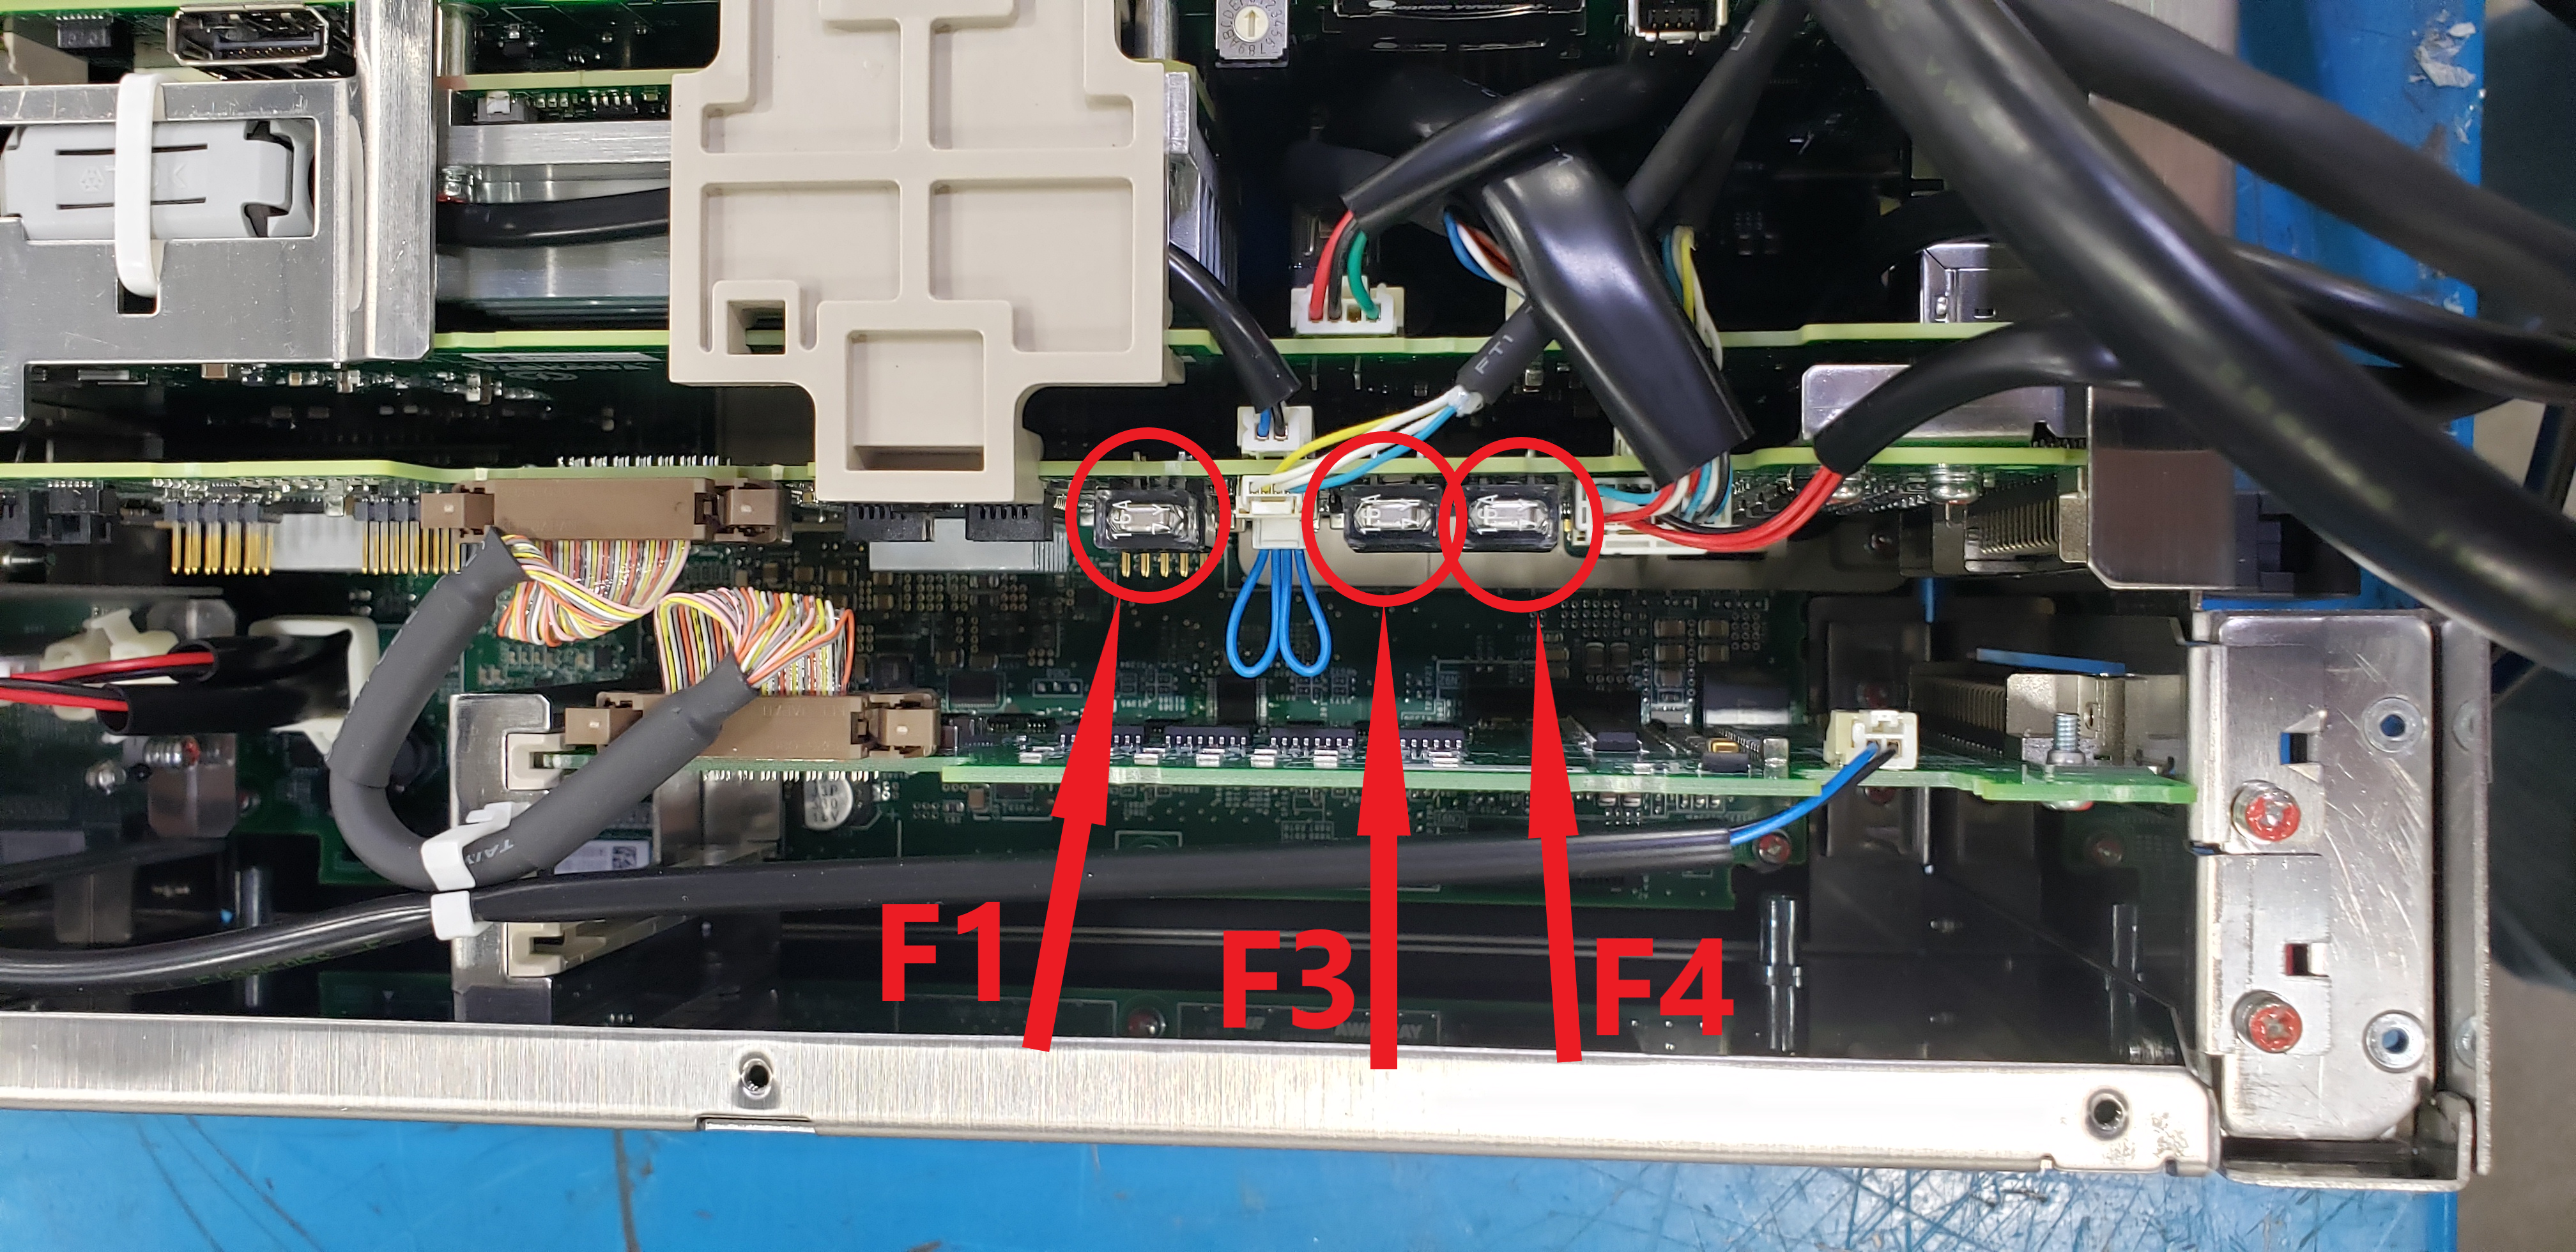
- Install new fuse
- Replace cover
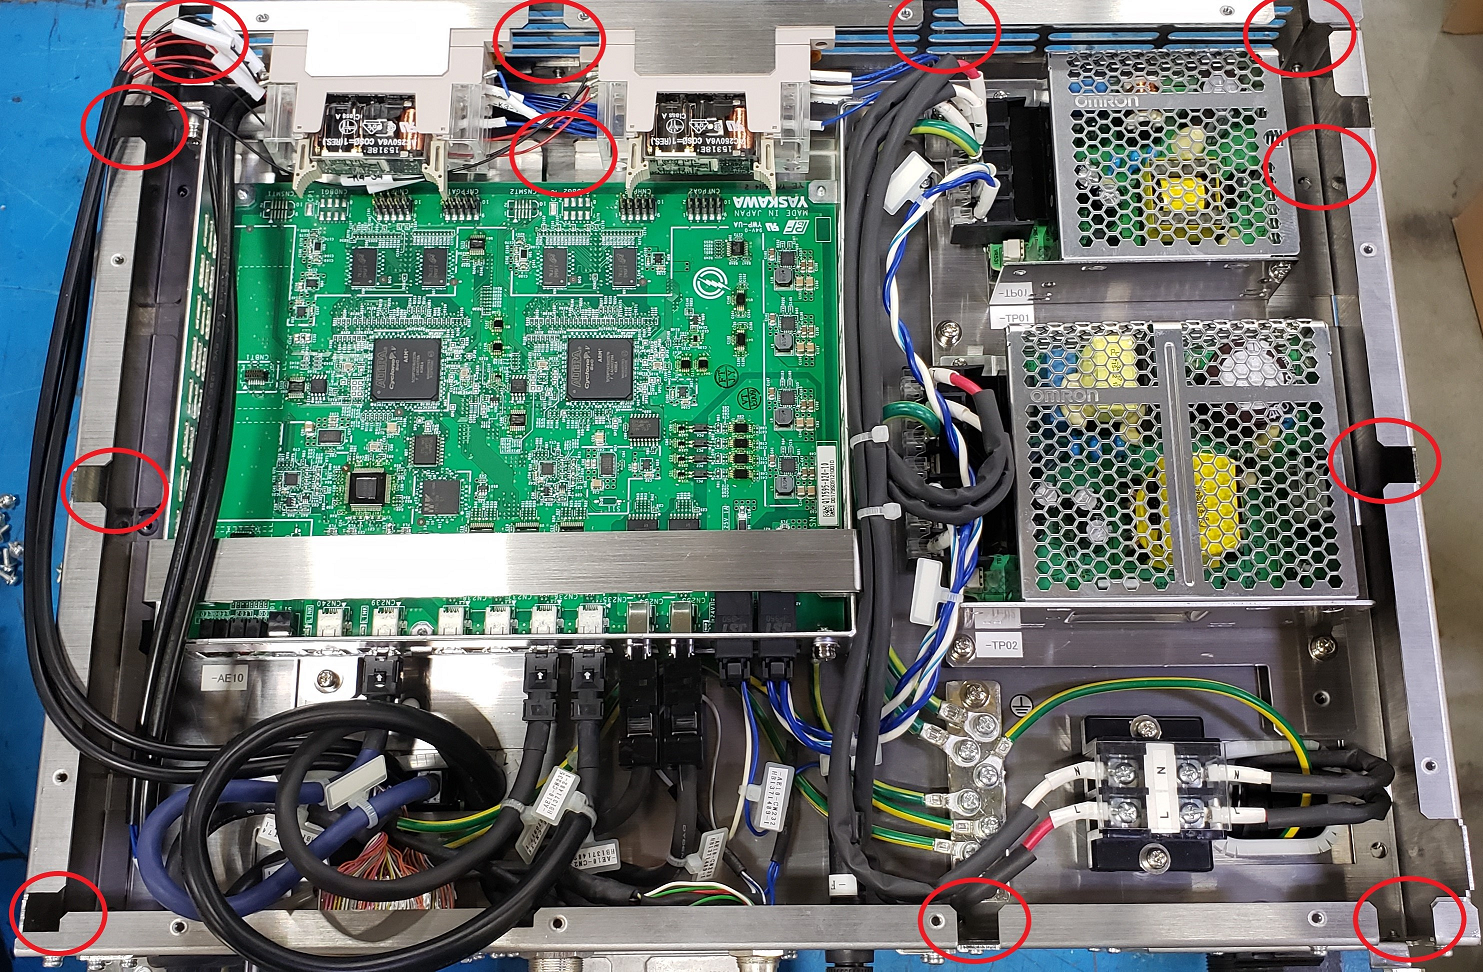
- For HC10DT with a PFL module, once the cover is removed, remove the 12 screws that hold the PFL module to the controller.
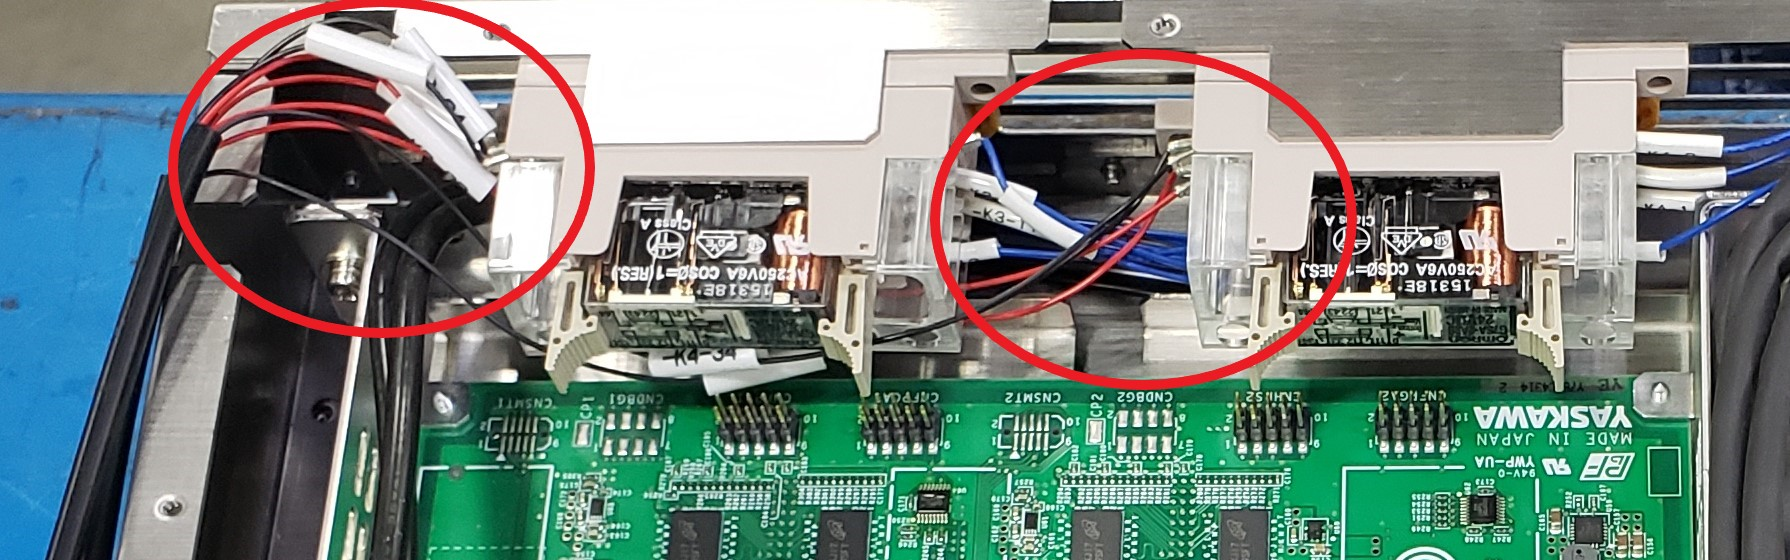
- Disconnect the red and black wires from the relays below.
- Disconnect the 3 communication cables seen below.
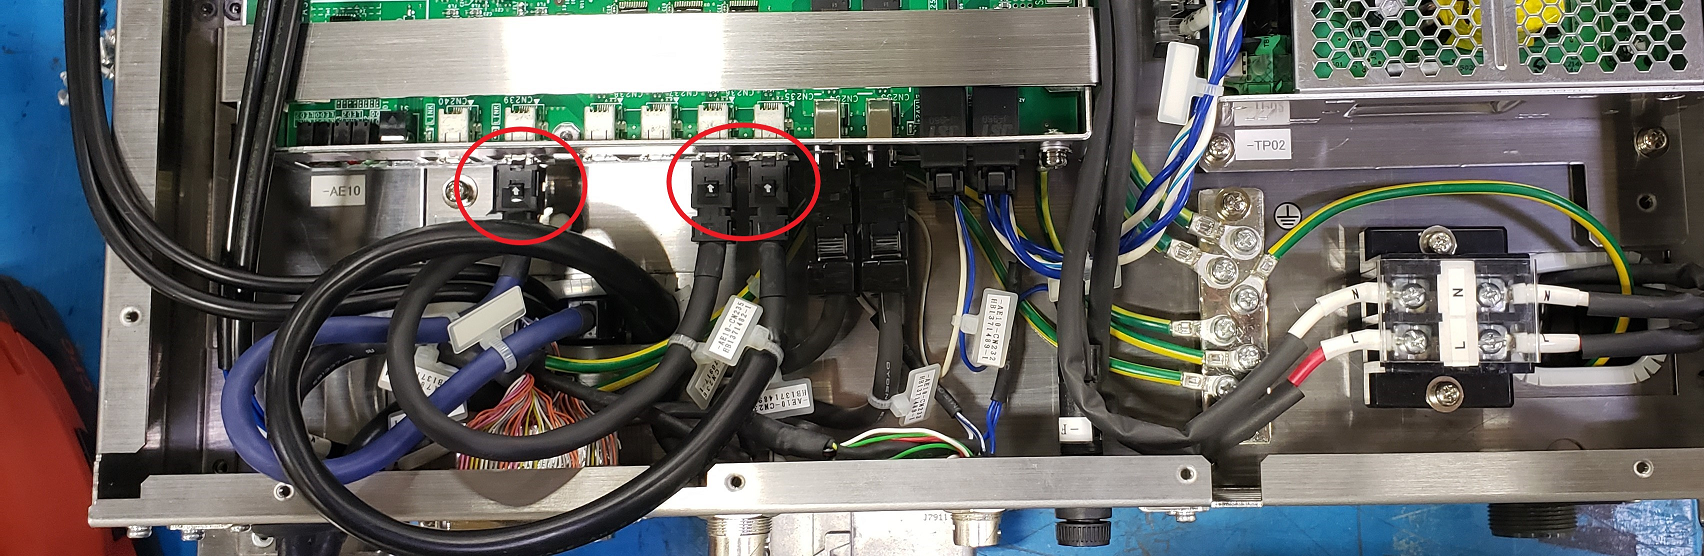
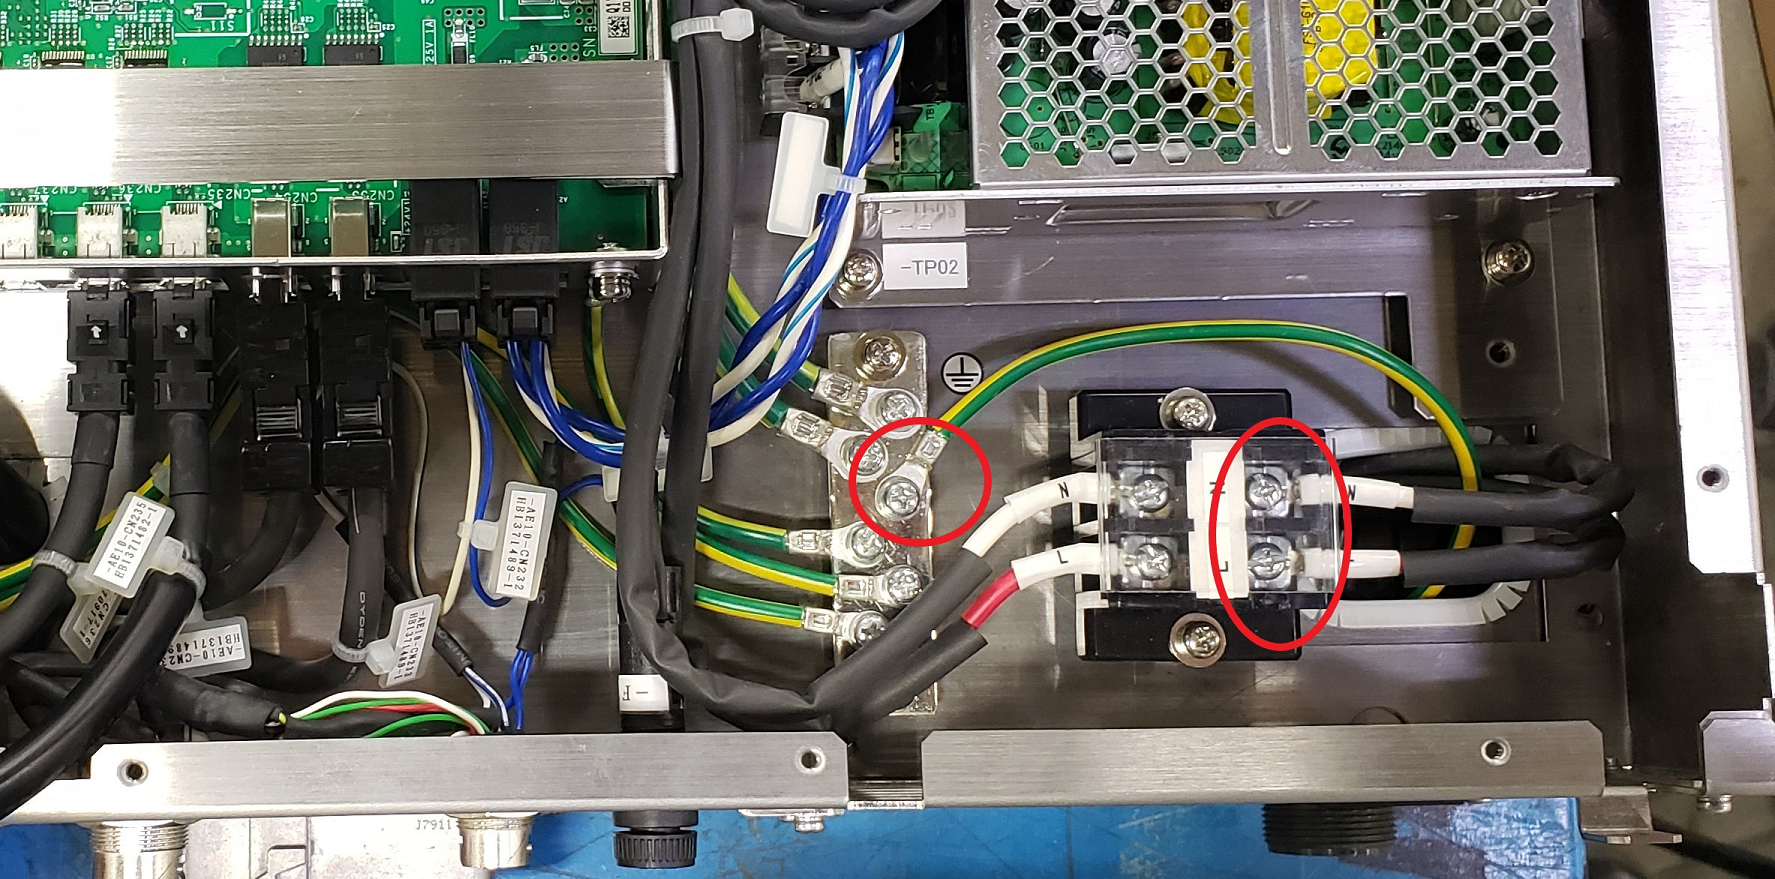
- Disconnect the line, neutral, and ground wires from the PFL module seen below.
- Carefully lift the PFL module from the controller while sliding the disconnected cables/wires through the access holes.
- Once the PFL module has been removed, remove the remaining 2 screws on the cover to gain access to the inside of the controller.
- Refer to Steps 3-5 above for fuse replacement.
Comments
0 comments
Please sign in to leave a comment.