Introduction
On the ROBOT menu of the teach pendant, you will see entries for “HOME POSITION”, “SECOND HOME POS”, and “WORK HOME POS”. Each of these has a different meaning and purpose. This document will explain what those positions are and what they should be used for.
Home Position
The Home Position is the manipulator’s calibration posture, confirmed by axis indicators such as keyways, casting marks or alignment arrows, where the absolute encoder data of each axis is recorded. This allows the controller to read all 0’s for each axis under current position at this posture. Calibration is performed for all axes prior to shipment from the factory. Different robot models have different home positions, always consult documentation for the correct manipulator model to confirm the home position posture.
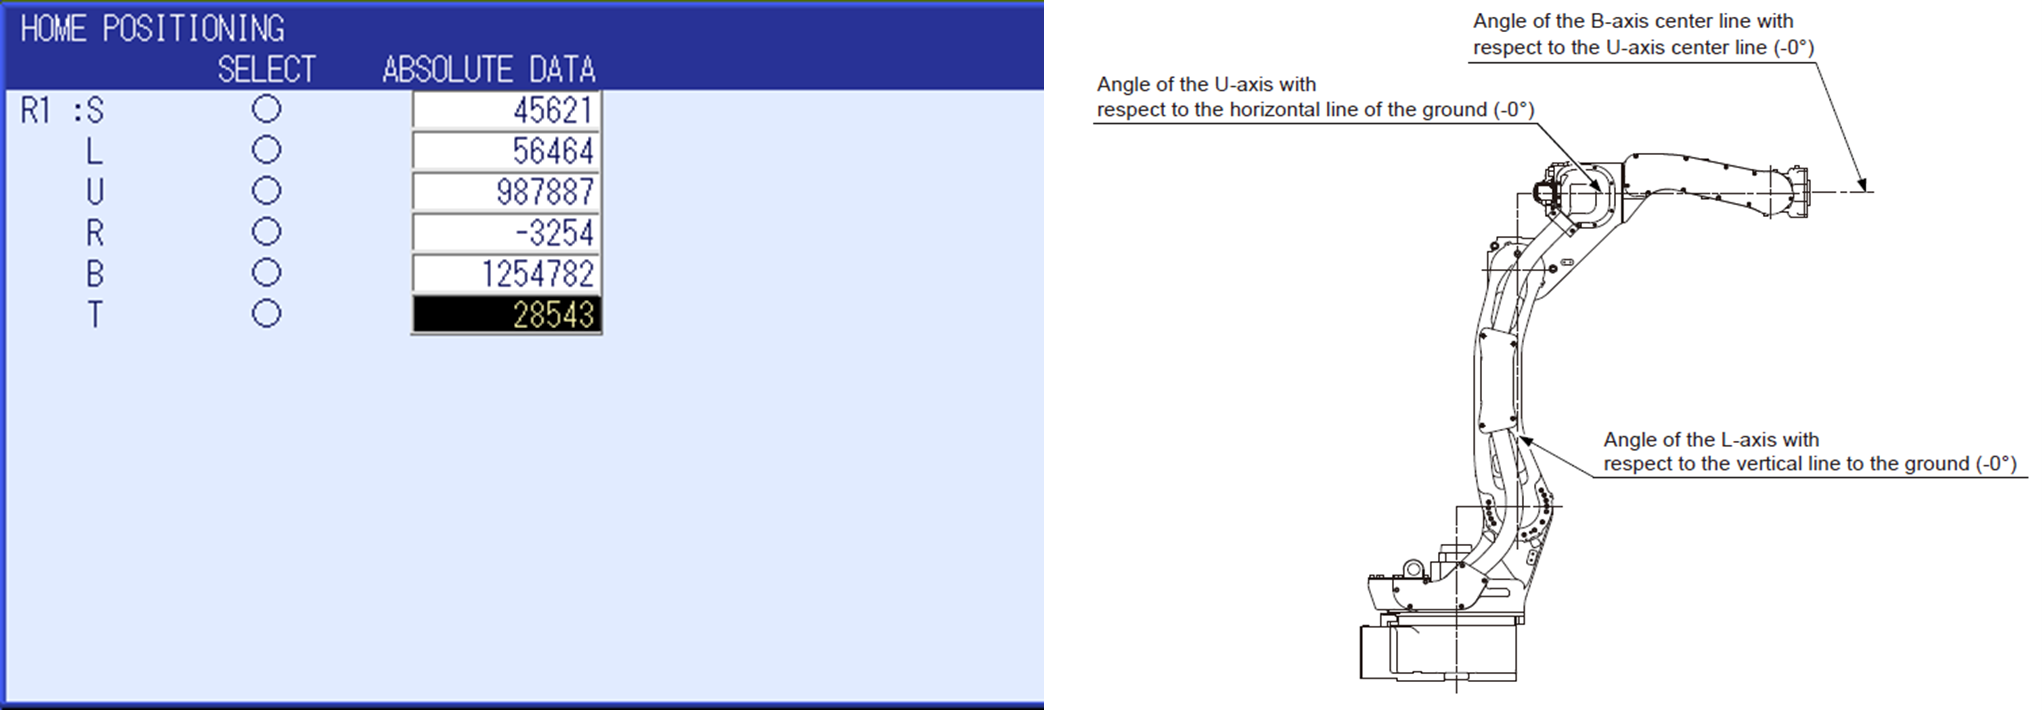
| Under normal circumstances the Home Position should never be modified or deleted. The few exceptions being having to replace a motor/encoder, losing the abso (Absolute Encoder Position) data due to loss of battery life, replacing a circuit board, or deviation from alignment marks caused by a severe crash. In these situations refer to the controllers maintenance manual on how to create new home position data. |  |
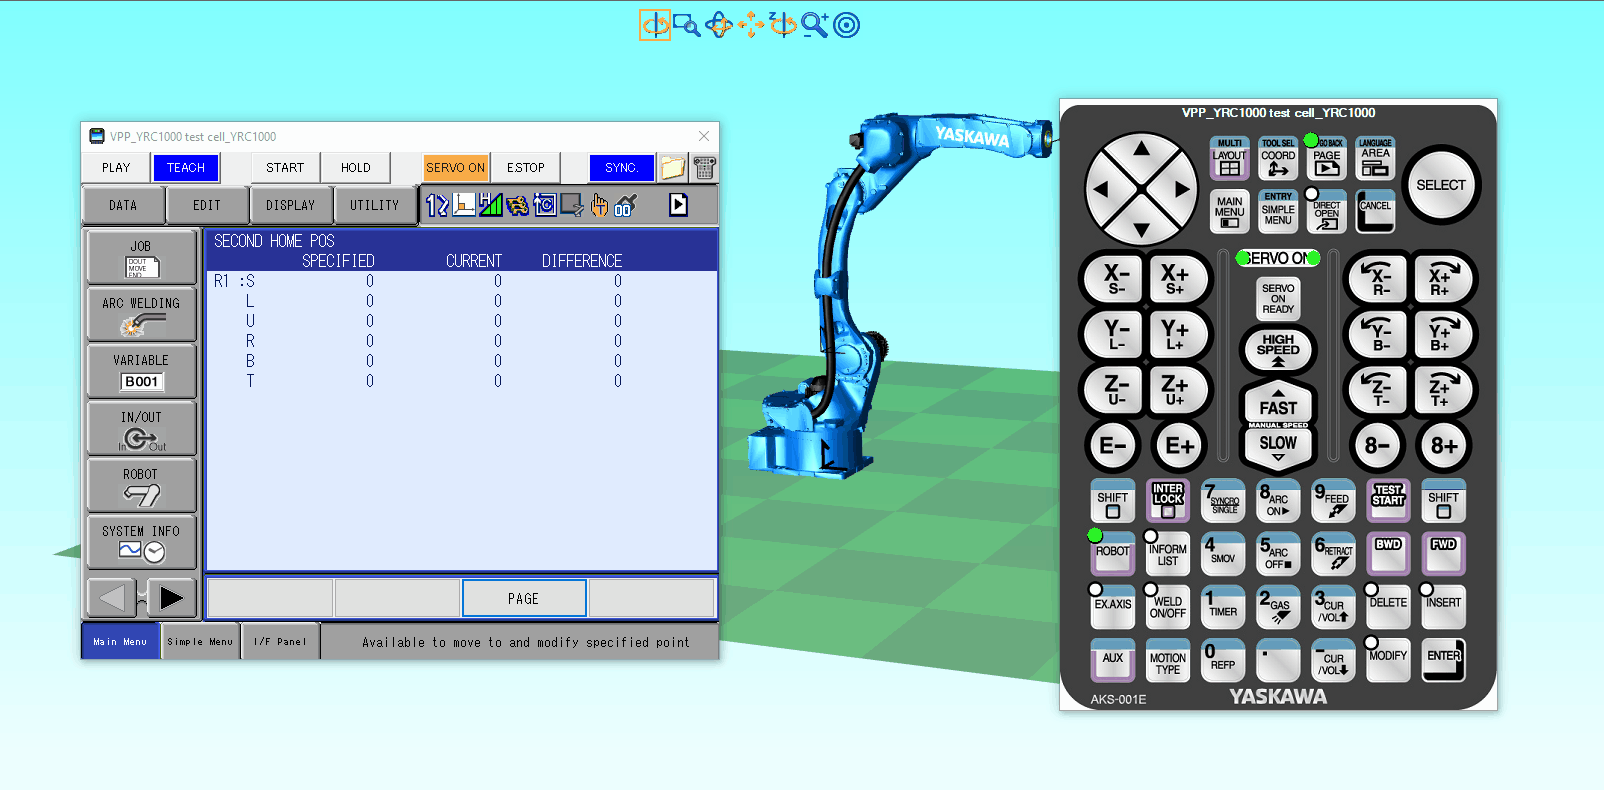
Second Home Position
The Second Home Position is used as a check point for the home position calibration, often in response to the “OUT OF RANGE (ABSO DATA)” alarm and “Check Position” message in the Human Interface Display Area. The default SECOND HOME (Specified Point) location for the robot is where pulse data for each axis is displayed as all zeros and the alignment arrows or keyways for each axis are aligned. However due to cell layout it may not be possible for the manipulator to reach this position after installation, in this situation you can modify the second home position location to recover from these alarms.
Tip
If you have modified the second home position, it is also a good idea to create or scribe a new alignment mark for each axis. This will serve the same purpose as the alignment marks for the Home Position and will help to provide a visual in case of deviation.
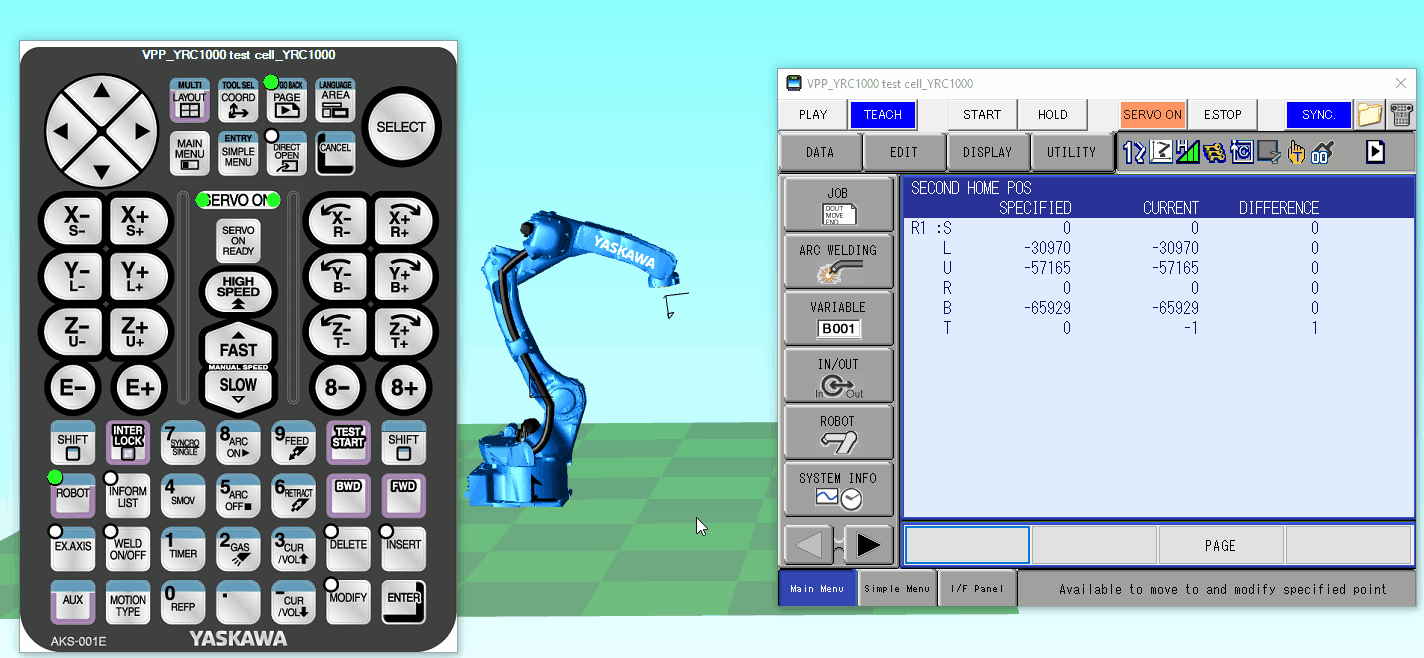
How to restore the original Second Home Position
If you have modified the Second Home Position and need to bring it back to the original position of all 0’s there is an easy way to do this.
- Create a Position Variable using Pulse data. This will populate with 0 pulse counts for each axis
- Engage servos and hold the forward key until the cursor stops flashing and leave servos engaged.
- With Servos still engaged, open the Second Home Position screen.
- Ensure you see all 0’s for ‘current position” and press Modify then Enter.
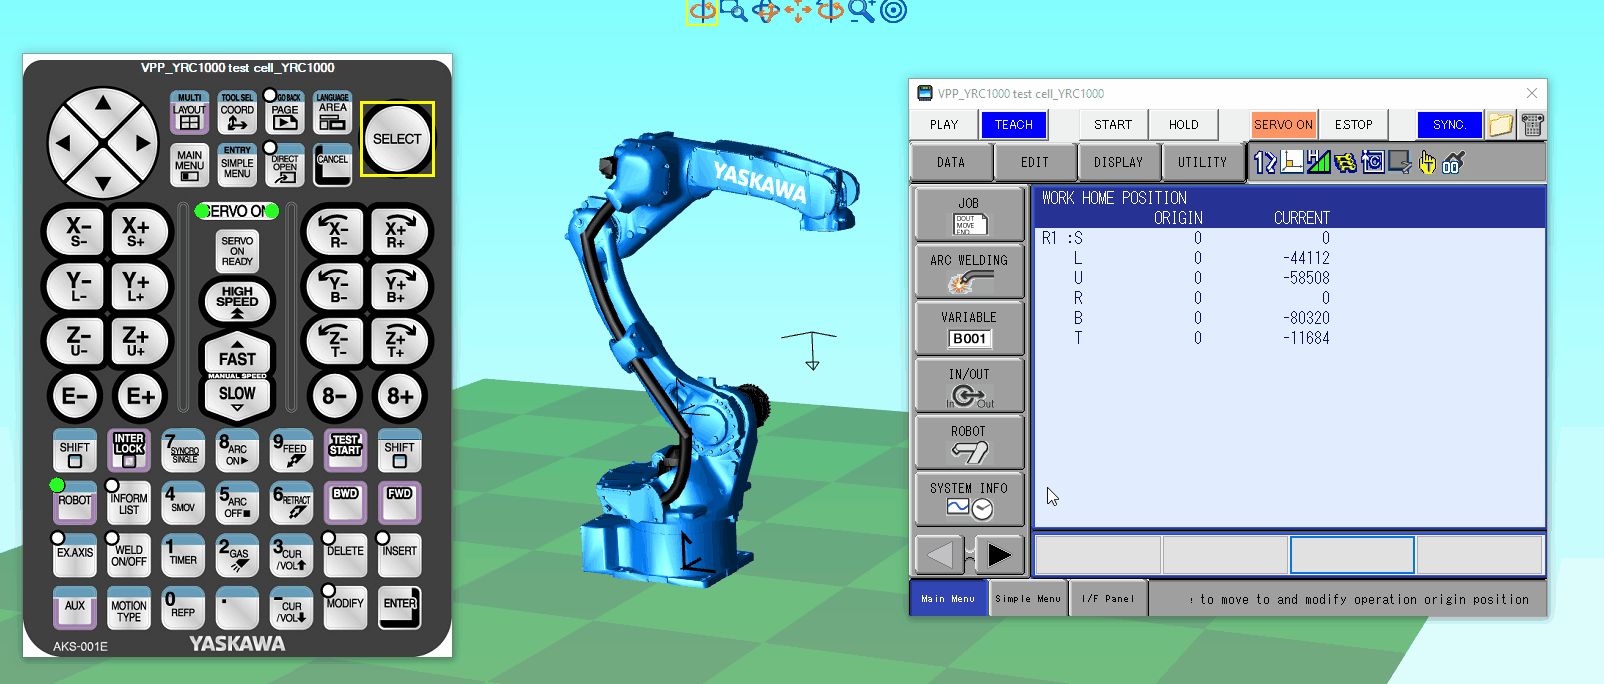
Work Home Position
The Work Home Position can be used as a simplified “auto home routine”, however there are other uses for this that will be detailed below. It is important to know that when using this function, the robot will take a joint move from where it currently sits in space directly to the Work Home Position and does not account for any obstacles that may be in the way. With the YRC1000 controller the speed of this motion is controlled by parameter S1CxG56 units :0.01%. By default, the Work Home Position is set with all 0’s for each axis.
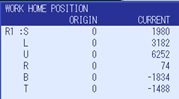 |
The advantage of the Work Home Position is that the robot can be commanded to move there from an external device. This is done by mapping one of your devices allocated External Input address to #40170 (Specific Input #0129). STR #20030 / OUT #40170 Another advantage is that when creating/modifying the work home position you are also creating Interference Cube 64 (Specific Output #120) at the same time. On the YRC1000, the size of the cube is determined by parameter S3C1097. This means you can also monitor if the robot is at the safe starting position from an external device with another simple ladder modification. STR #50157 / OUT #30030 |
Registering the Work Home Position
- Jog the robot to your established safe starting position.
- Select [ROBOT] / [WORK HOME POS]
- With servos on, press modify then enter on the keypad. Your new work home position is now registered. Cube 64 has also just been created.
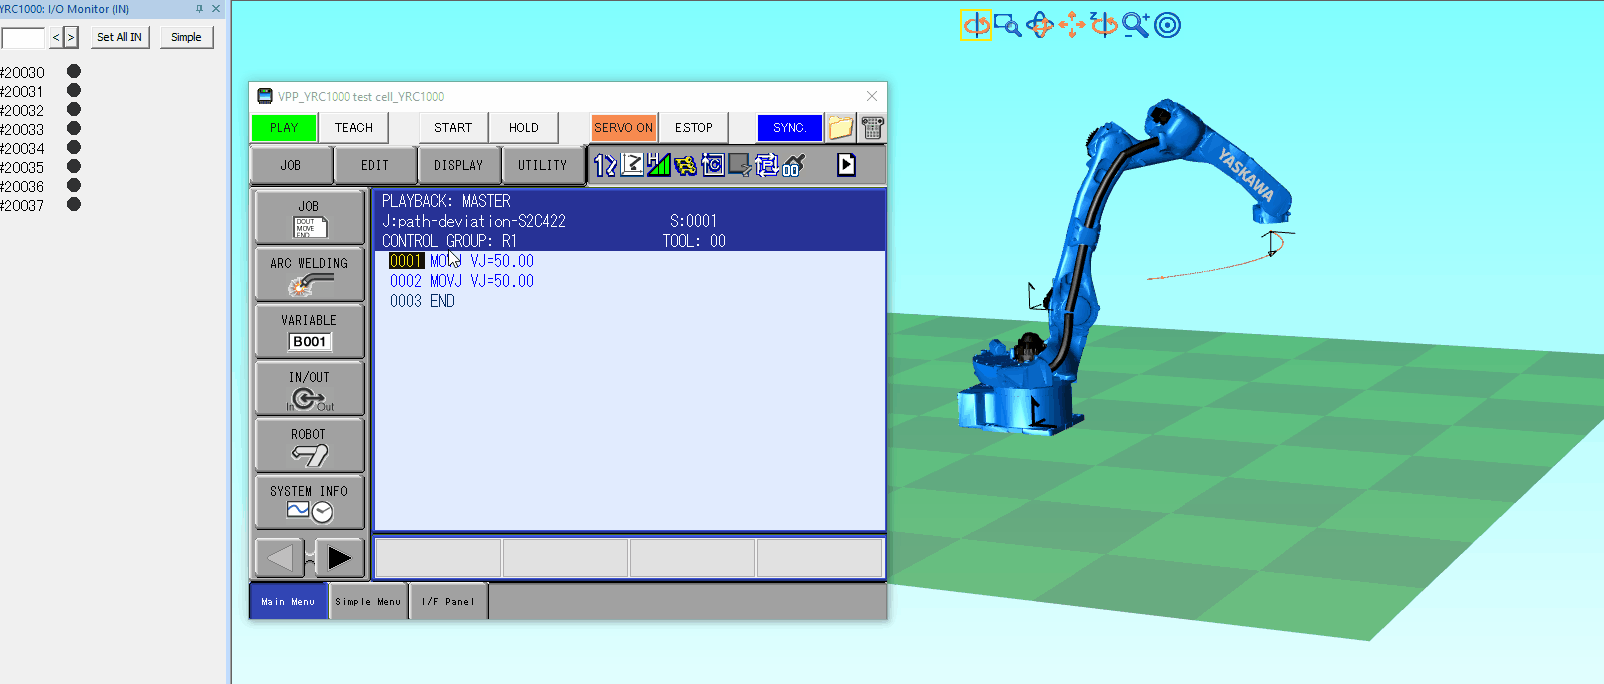
Let’s see how it works
We will run a simple routine and then trigger the input to send the robot to the Work Home Position
Tips and other ways to use Work Home Position
Most cells have obstacles and peripheral equipment the robot works around, and it can be worrisome to trust an operator to use this function without crashing the robot. In these cases, more advanced “Auto Home Routines” are required. However, you can instead use this Work Home Position as an operator/maintenance access position. For example, if your robot’s Home position is often in the way during change overs or daily cell cleaning, create the work home position in an area so that the robot is out of the way, yet still in a safe path to travel from the home position to the work home position. This gives you the ability to move the robot out of the way by toggling an input from the HMI rather than an operator jogging the robot to an unsafe position.
While modifying the work home position does create/modify cube 64, creating and changing cube 64 does not overwrite the work home position. You can create a work home position and then clear the cube 64 data and the robot will still move to the stored work home position when triggered. You can then use cube 64 for other means, this can get tricky as any modification of the work home position will again overwrite the data in Cube 64.
Comments
0 comments
Please sign in to leave a comment.