Introduction
After taking the time to add a tool to the robot, it can be added to the model library to be used on other projects.
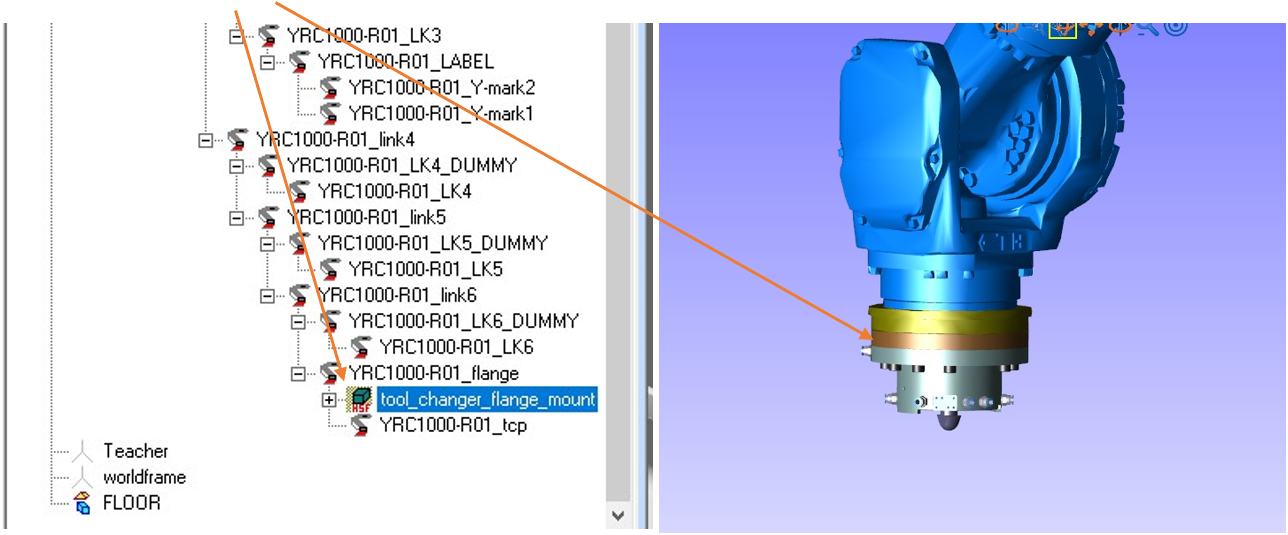
- First attach the tool to the robot flange.
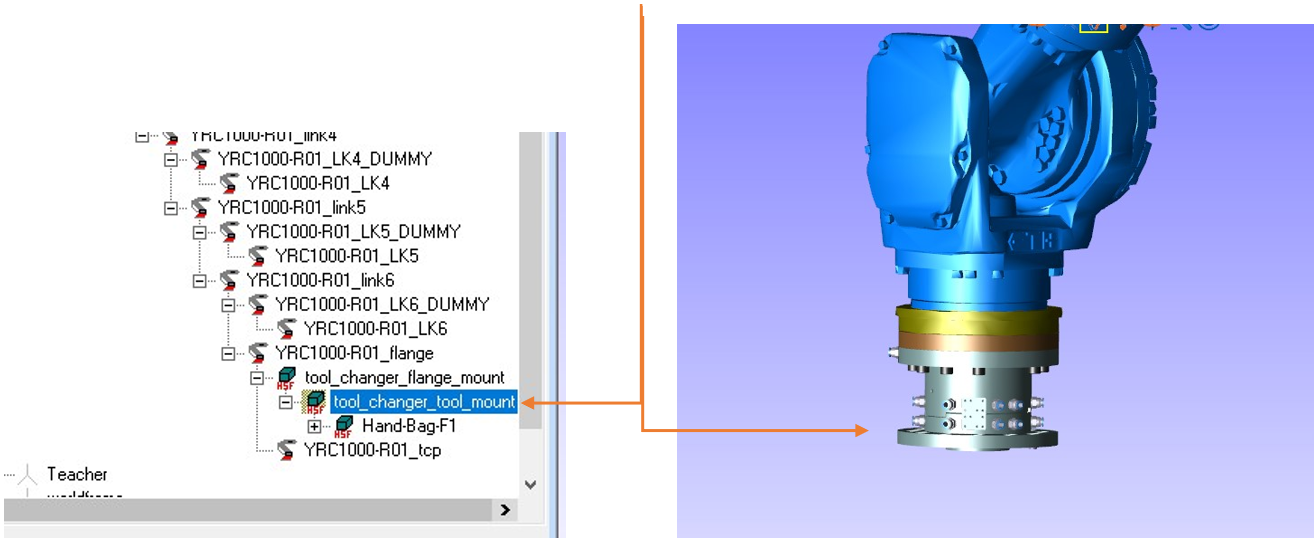
- Add second part of tool to the first part as a child to that first part.
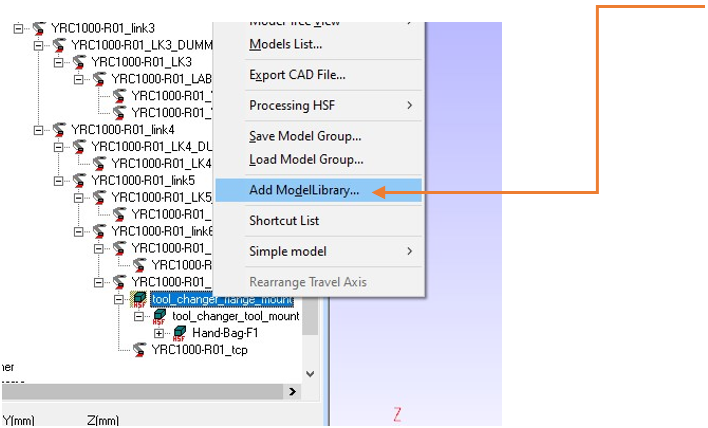
- Highlight the model that you want to save. Right click on the model you have highlighted and click on Add Model Library.
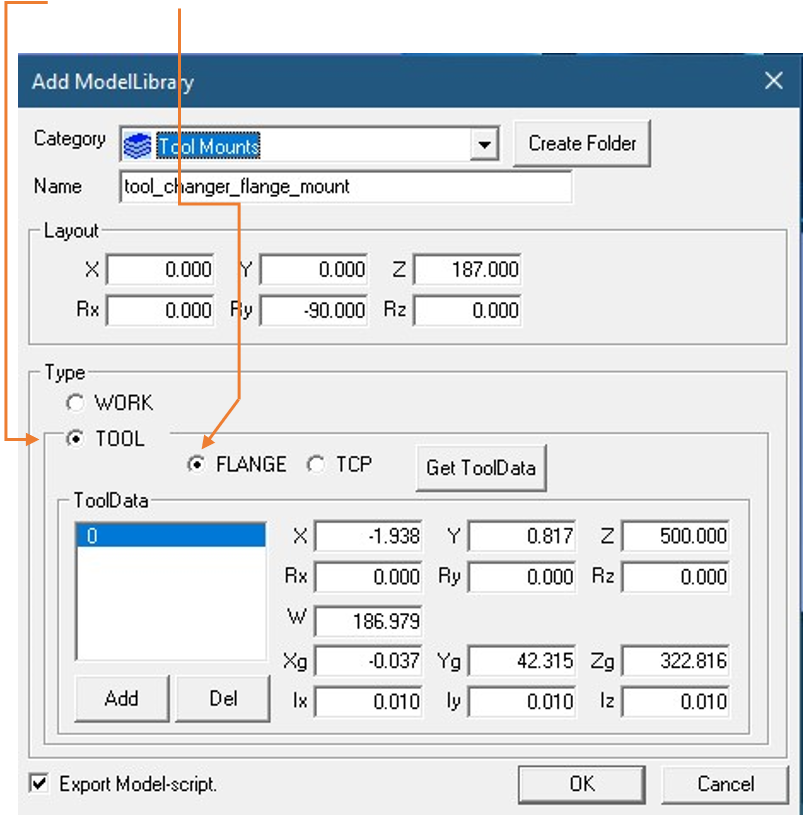
- Window will open to add model to library. Pick a folder to add the model, or create a new folder to put the model in. A folder called Tool Mounts was created for the tool changer here.
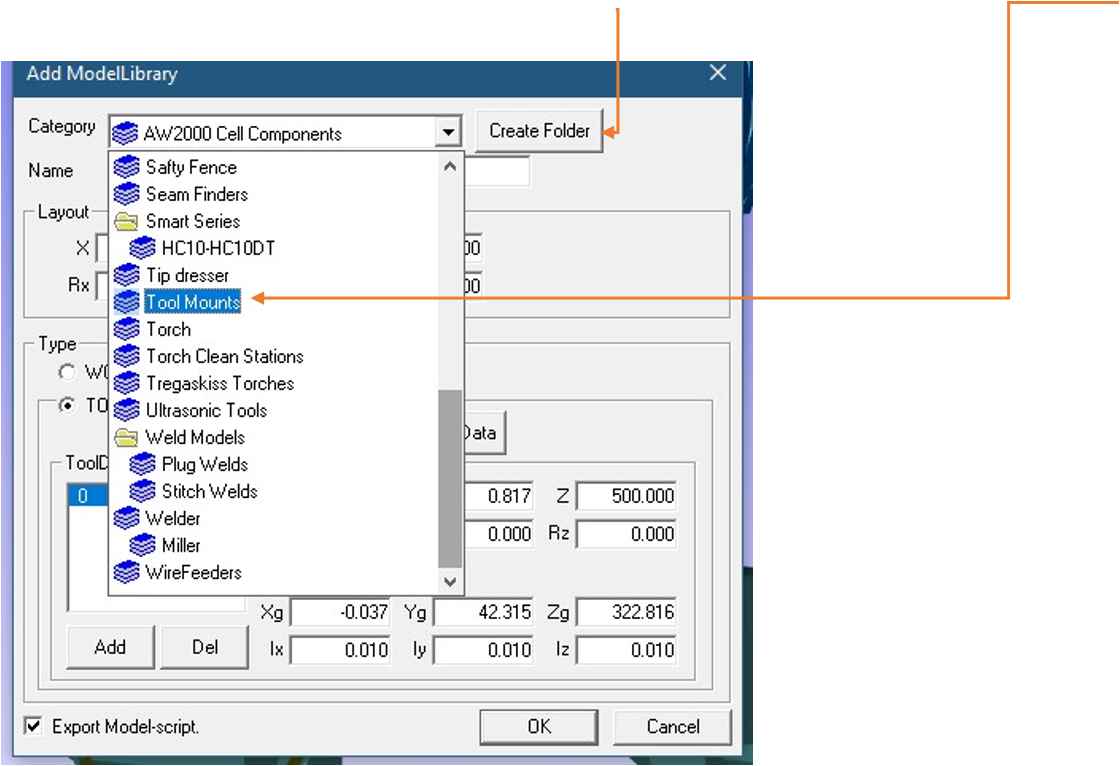
- Once the folder is picked for location of tool, make sure the layout values match the position of the tool on the robot. In this case, this is the first part of a multi part tool. Make sure that TOOL and FLANGE are both checked. Then click on ok. After this is added to the library, then it can be quickly dragged and dropped to the flange in the future on any project.
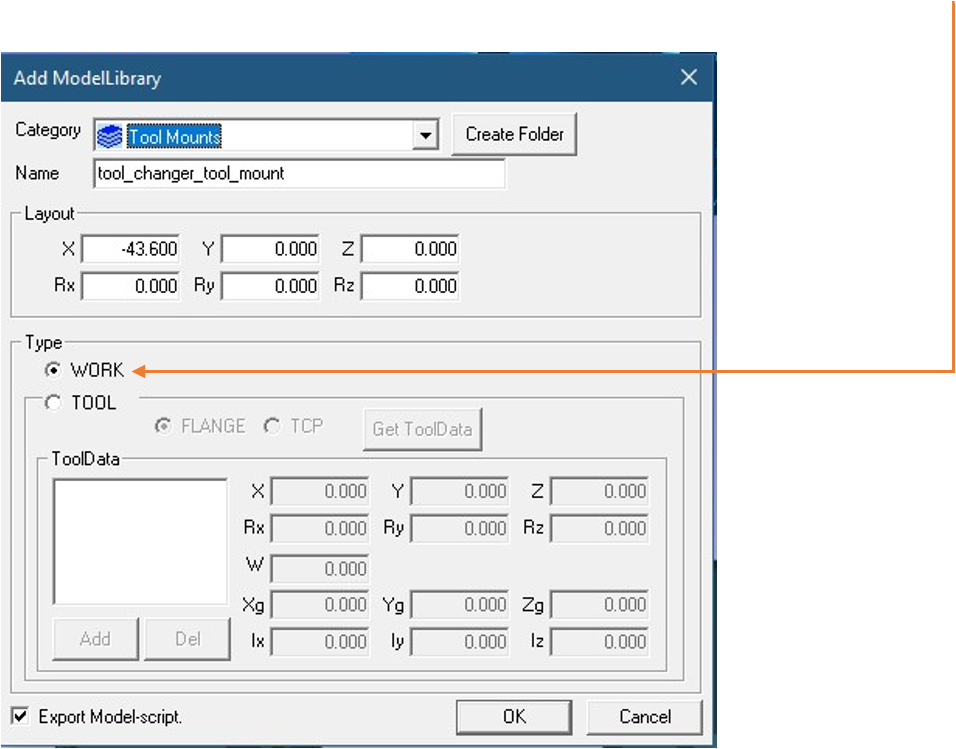
- Once the first part is saved to the model library, highlight the second part of the tool in the card tree that was added earlier. This will be saved to the same Tool Mounts folder. Instead of being a tool and attached to the flange, it will be a WORK type of model. Make sure that WORK is checked. This way, when you drag and drop this model to the end of arm, it will snap in location on the first tool.
Conclusion:
- Any model you import can be added to the MODEL LIBRARY for future use. Make sure it is setup correctly to start with before it is added to the library.
- An image of the model should be saved with it as well. Make sure the model is zoomed into the best as possible. No need to worry about any other model, like the robot in the view. They will be automatically turned off when saving image.

Comments
0 comments
Please sign in to leave a comment.