Procedure
- Once power is applied to the robot controller, the Keyence amplifier’s display should illuminate. If the laser sensor does not illuminate, verify cabling, power connections, and fusing.
- While pressing the [MODE] button on the main screen, press the [SET] button 5 times. [rESET] is displayed on the main display (upper level).
- Press the ▲ / ▼ button to select [YES] and press [MODE] button.
- On the amplifier, press the ▲ / ▼ button to select NPN polarity.
- Press [MODE] button twice. [End] blinks several times on the sub display and the main screen appears.
- After the initialization is complete, [End] blinks several times on the sub display and the main screen is
- Load the system ladder containing the Accufast II ladder changes along with the Macro-Touch routine changes (provided by project engineer).
Setting Pressure Regulator:
- Set the pressure regulator for the air knife / door control to 90 psi (minimum pressure required for proper door operation).
Setting the Focal Length:
- For each Accufast II in the system, turn on the specified output to open the Accufast II’s door. The laser light should already be on and a laser dot should become visible.
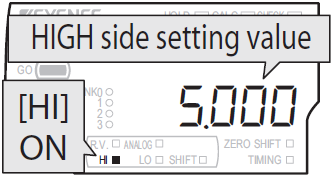
- Press the ◄ / ► button from the main screen until the HIGH side setting value is selected on the sub display (lower level).
- Position the robot over a clean piece of metal, jog the robot until the laser sensor is perpendicular to the part, and drive the contact tip until it just makes contact with the metal surface.
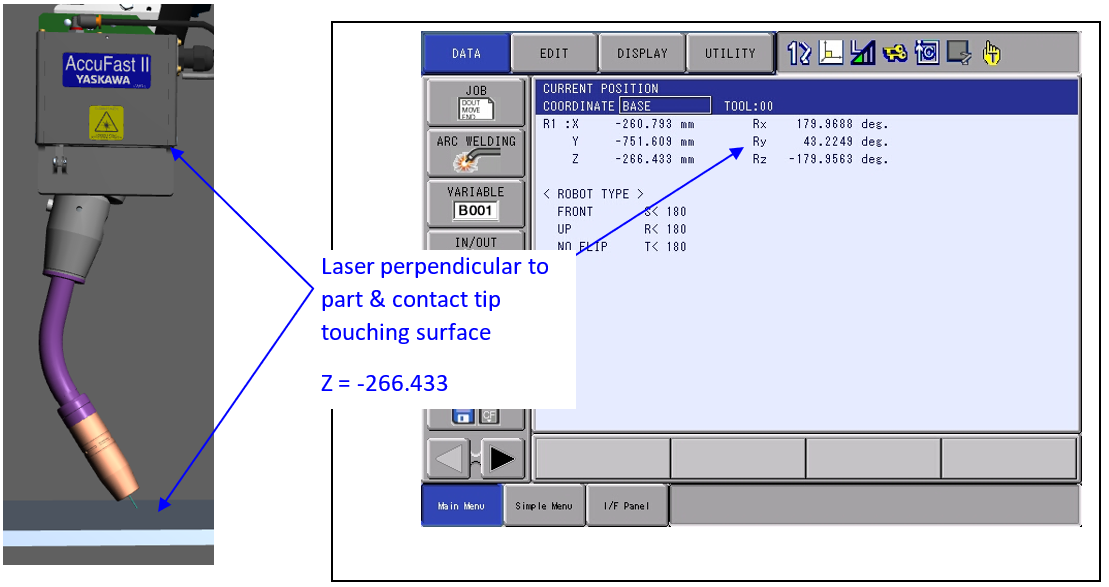
With the contact tip touching the part, note the robot’s “Current Position” in base frame.
Setting Current Position
- While maintaining servo power and the contact to the surface, press the “Set” button on the amplifier unit. “HiSEt” will be displayed on the main display.
- Press the “Set” button again, and the current value will be stored as the high end of the target range.
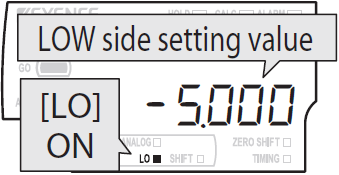
- Press the ◄ / ► button from the main screen until the LOW side setting value is selected on the sub display (lower level).
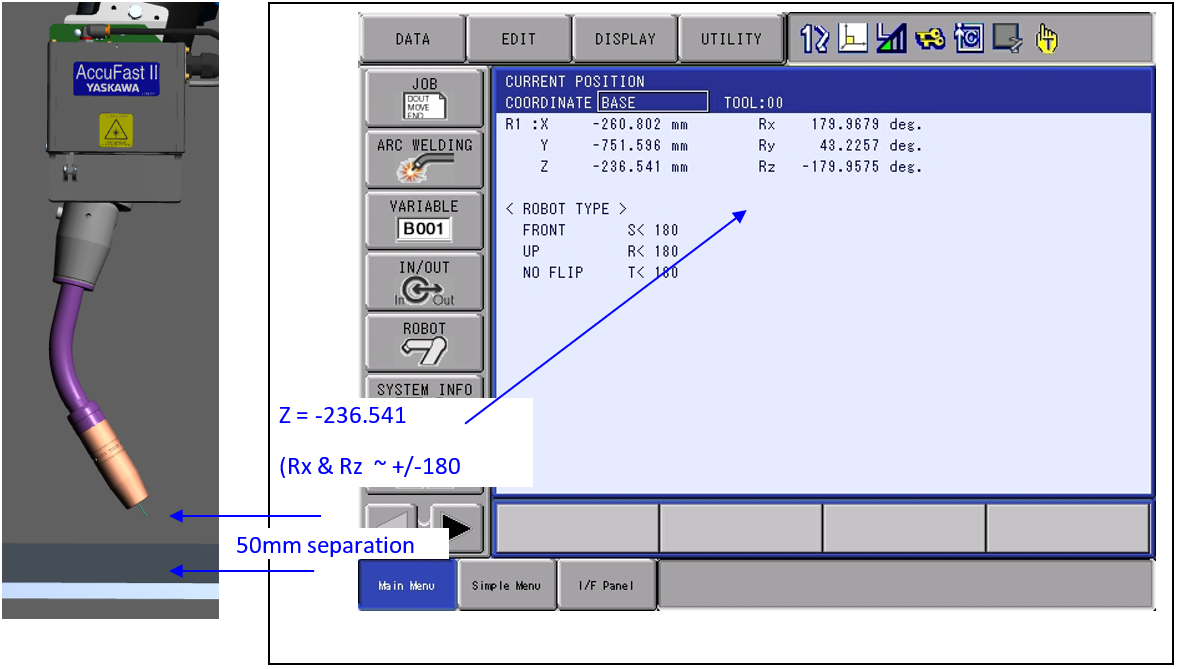
- Jog the robot away from the part in world coordinates Z+ DIRECTION ONLY until a 50mm change in the Z+ direction is noted (This will result in a 50mm separation between the part contact tip).
- While maintaining servo power and the 50mm separation, press the “Set” button on the amplifier unit. “LoSEt” will be displayed on the main display.
- Press the “Set” button again, and the current value will be stored as the low end of the target range.
*Note: This sets the focal length to the default distance we ship the laser out with. You do not have to choose this distance. With the Keyence laser you can set almost any length that suits your needs.
Comments
0 comments
Please sign in to leave a comment.