This guide will provide an overview of Motion Instructions. First, the different Motion Types available for programming are described. Then, the following sections will describe how to insert and modify Motion Instructions.
Motion Types/Instructions
Yaskawa Controllers contain the following Motion Types:
Joint Interpolation
Joint interpolation is used when the manipulator does not need to move in a specific path toward the next step position. When the joint interpolation is used for teaching a robot motion, the instruction is JointMove. Use joint interpolation to teach the first step. This will avoid unintentional motion errors in the singularity posture at the beginning of the motion.
Play Speeds are indicated as percentages of the maximum rate of joint speed.
Linear Interpolation
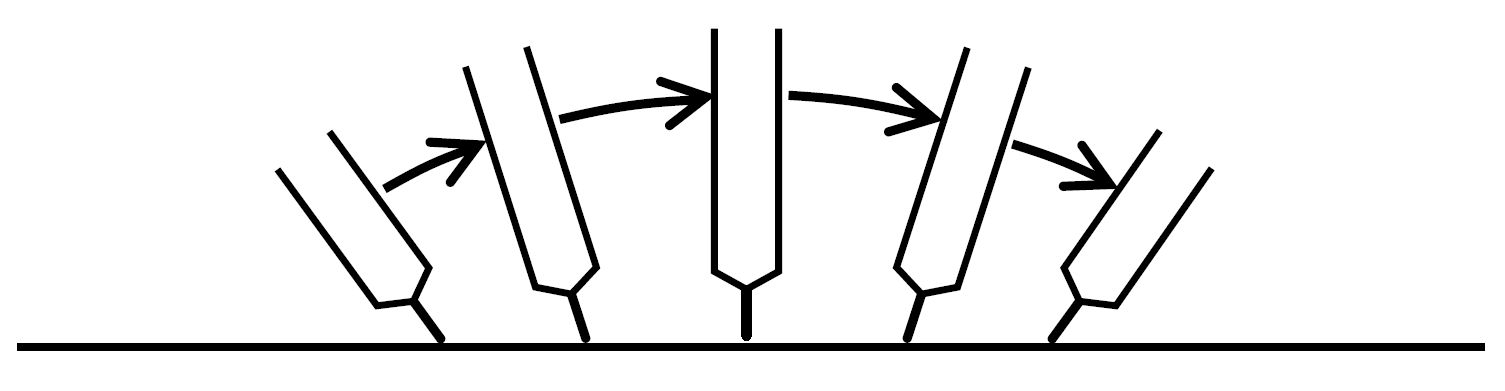
When the manipulator TCP moves in a straight line path from one taught step to the next, it is described as linear interpolation. When linear interpolation is used to teach a robot motion, the instruction to use is LinearMove. The manipulator will move automatically while changing the wrist position as shown in the figure below.
Play Speeds are indicated as mm/sec of the TCP speed. The maximum TCP speed is manipulator dependent.
Circular Interpolation
When the manipulator TCP moves in an arc that passes through three points, the movement is described as a circular interpolation. When circular interpolation is used for teaching a robot motion, the instruction to use is CircleMove.
Play Speeds are indicated as mm/sec of the TCP speed. The maximum TCP speed is manipulator dependent.
Example Circular Arc Interpolation
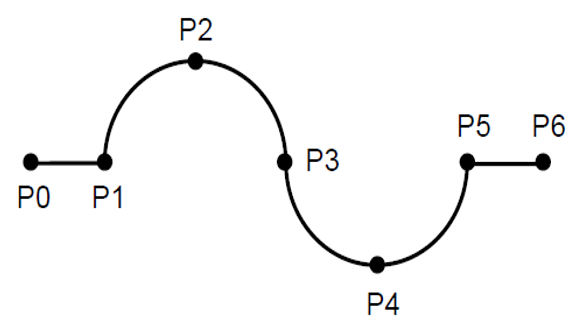 |
Point | Interpolation Type | Instruction |
|
P0 |
Joint or Linear |
JointMove LinearMove |
|
|
P1 P2 |
Circular |
CircleMove |
|
|
P3 |
Circular |
CircleMove FPT |
|
|
P4 P5 |
Circular |
CircleMove |
|
|
P6 |
Joint or Linear |
JointMove LinearMove |
Spline Interpolation
When performing operations such as welding, cutting, and applying primer, using the spline interpolation simplifies the teaching process for workpieces with irregular shapes. The path of motion is a parabola passing through three points. When spline interpolation is used for teaching a robot motion, the instruction to use is SplineMove.
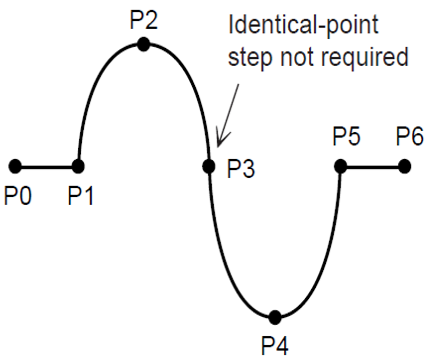 |
Point | Interpolation Type | Instruction |
|
P0 |
Joint or Linear |
JointMove LinearMove |
|
|
P1 to P5 |
Spline |
SplineMove |
|
|
P6 |
Joint or Linear |
JointMove LinearMove |
Adding Motion Instructions
There are two methods for adding a motion instruction to a job:
- Teaching a Position
- Using a Position Variable
Teaching a Position
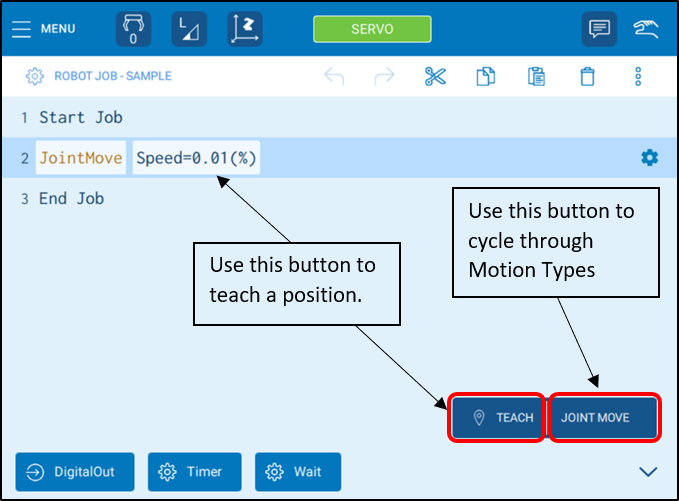
To teach a position, press the {TEACH} button from Job Contents view (shown below). This will add a motion to the current robot position of the Motion Type displayed next to the {TEACH} button. Press the right-side of this button ({Joint Move} on the picture) to cycle the Motion Type between Joint Move, Linear Move, Circular Move, and Spline Move.
Note: SERVO Power must be turned on the Teach a Position
Using a Position Variable
Another method of adding a motion instruction is to select the motion from the Command List. Open the Command List and navigate to the {Motion} tab. Select “Show advanced commands” if not already selected and then select the Motion Type to add. Then the command will be added to the job.
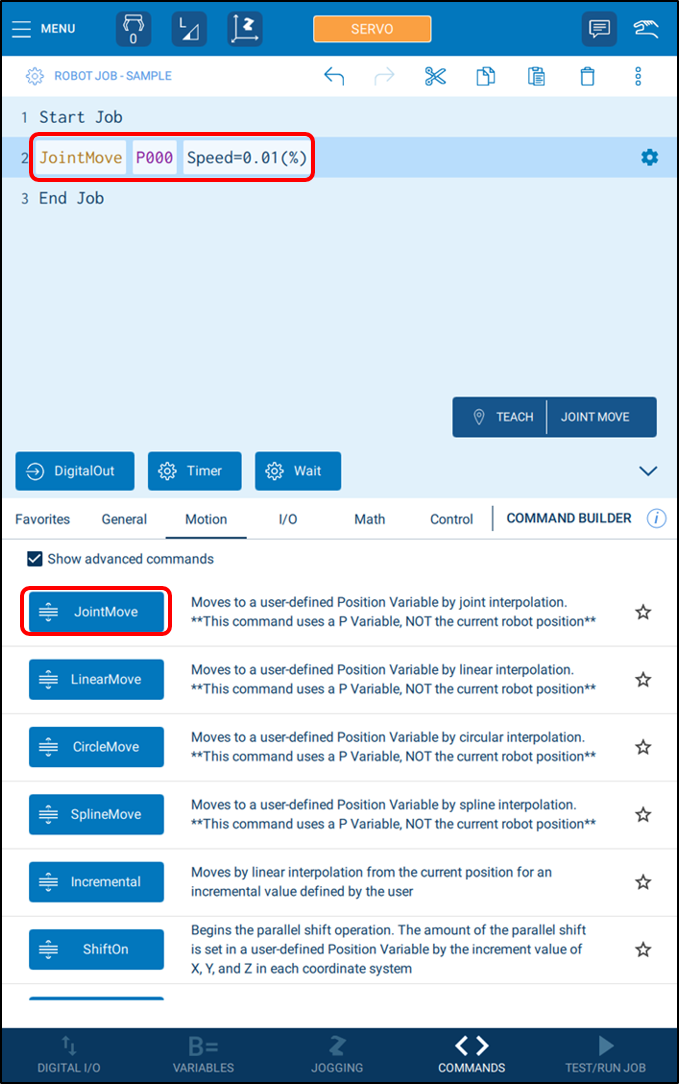
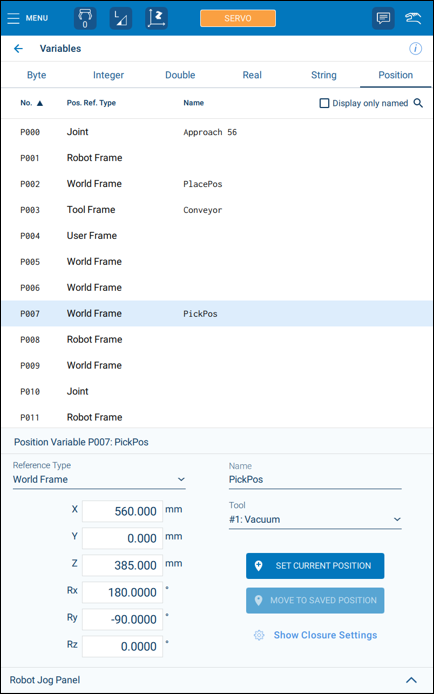
The big difference between this method and the previous one is that there is an extra “P000” parameter added to the instruction. This parameter refers to a Position Variable, and this instruction will move the robot to the position stored in this variable. To configure the P-Variable, press {MENU}->{PROGRAM/OPERATE}->{Variables} and then switch to the {Position} tab. From this page, the P-Variable can be “taught” by pressing the {SET CURRENT POSITION} button or the values can be entered manually.
Comparison of Methods
There are several tradeoffs to each of the methods described above. For Teaching a Position, the robot position data is local to the job. This means there is no risk of accidentally overwriting the position from another job or operation; however, it also means that the point cannot be reused in other jobs. Using a Position Variable has the opposite effect: the position is global and can be reused; however, it is easy to accidentally overwrite a Position Variable which can lead to unexpected motions.
The general recommendation is to use the first method (Teaching a Position) for most operations and only use Position Variables for a few special points in the application (e.g. an application start or safe position).
Modifying Motion Instructions
After inserting a Motion Instruction, there are two ways to modify the settings: inline and detail editing.
Inline Editing
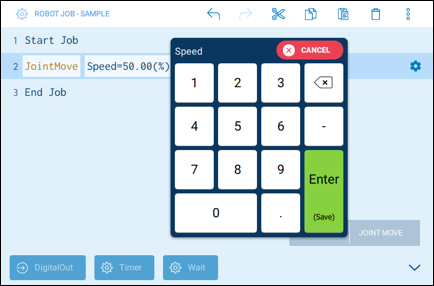
Inline Editing can be performed by selecting the desired instruction line in the Job Contents view and pressing any of the parameter buttons. This will bring up a keyboard which can be used to change the value. For example, the picture below shows changing the Speed parameter to 50.00.
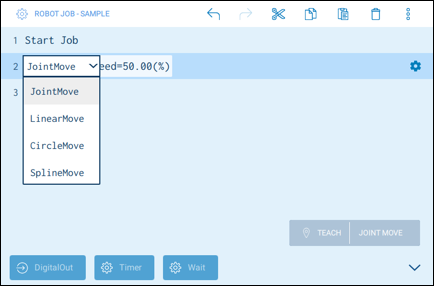
By pressing on the instruction name (e.g. JointMove), the Motion Type can also be changed:
Note: Inline Editing can only be used for editing current parameter. It cannot be used to change the type of a parameter or to add new parameters. For these actions, use Detail Editing.
Detail Editing
To bring up the Detail Editing panel, press the {Setting} button on the instruction line:
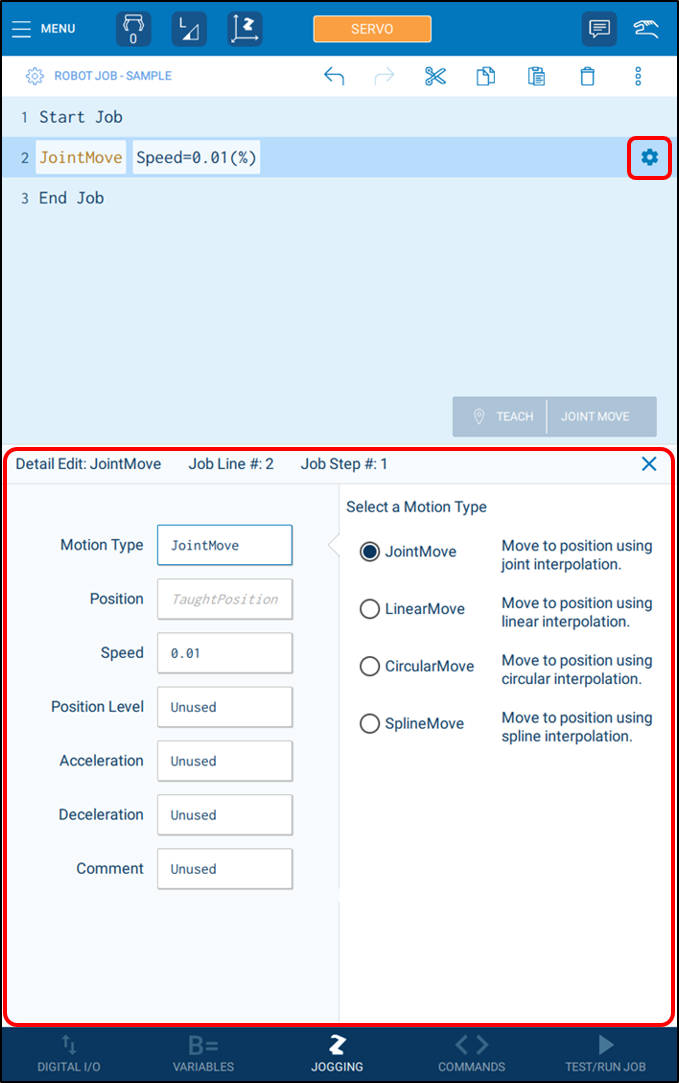
For a Motion Instruction, the Motion Type parameter is opened by default as shown above. From this panel, the Motion Type can be changed to JointMove, LinearMove, CircularMove, or SplineMove.
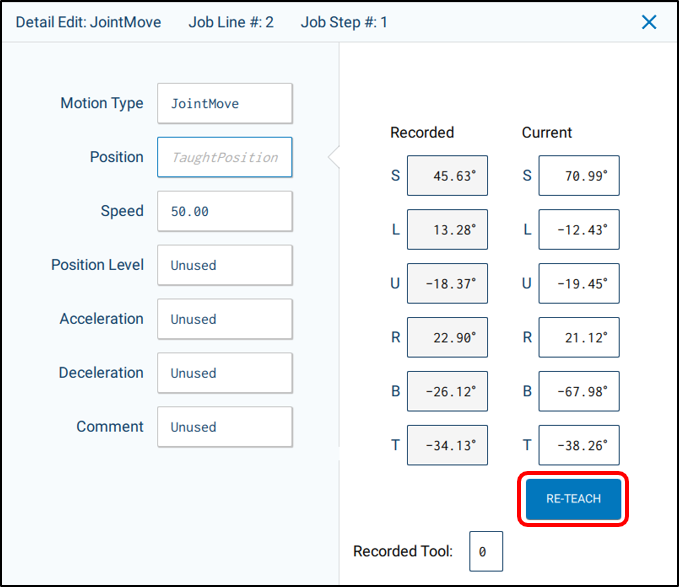
Pressing the “Position” parameter will bring up a panel that shows the current position of either the Taught Position or Position Variable. This panel also contains a {RE-TEACH} button that can be used to update the recorded position to the current robot position.
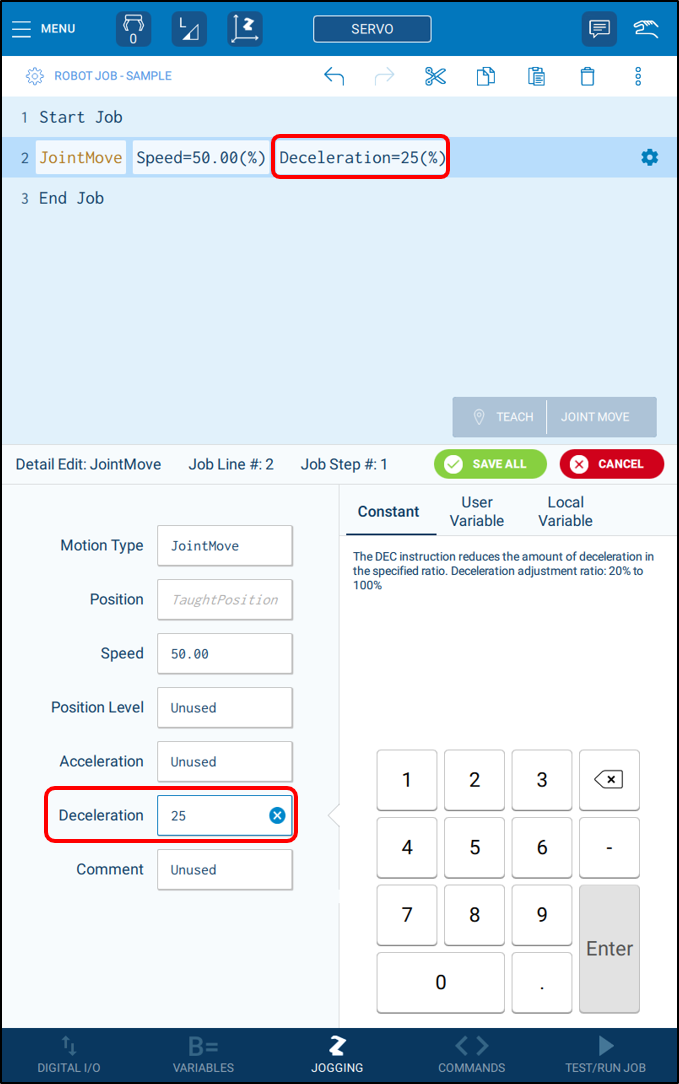
New parameters can also be added from the Detail Edit panel. For example, selecting the Deceleration parameter and entering a value will add this parameter to the instruction:
Comments
0 comments
Please sign in to leave a comment.