Introduction
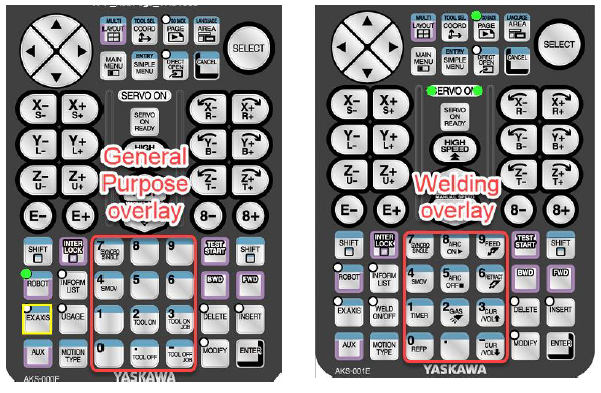
This document will describe setting up Key Allocation on the controller. Key Allocation allows users to set the function of specific keys for each application to a function of their choosing. Enabling frequently used functions to be used from pendant keys can help reduce or simplify programming. These hot keys are on the numeric keypad on the pendant, and by default a set are already assigned depending on application. These are what we refer to as maker keys, or the factory default keys. They will be labeled on the pendant overlay depending on what type of application your controller is configured for.
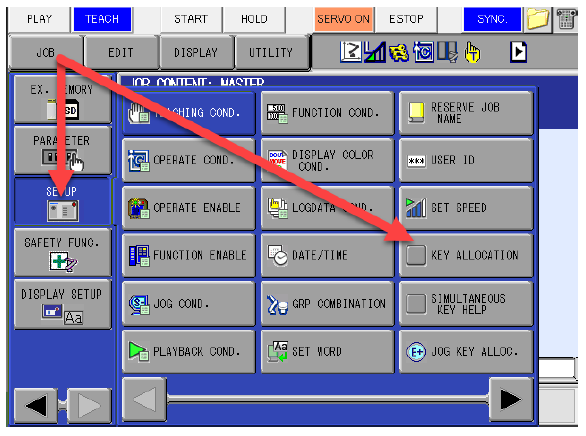
To begin setting up custom key allocation you will first need to be in the Management security level. From there Key Allocation can be found under the SETUP menu.
Once inside the Key Allocation screen you can use DISPLAY to choose between the two allocations, EACH and SIM.
EACH has default allocations based on the application for the numeric keys such as FEED, RETRACT, and GAS on a welding robot. Just pressing the key in a robot job will cause the function to occur. By default, these are set to MAKER, or factory default. These can be changed by the user but will overwrite the default setting.
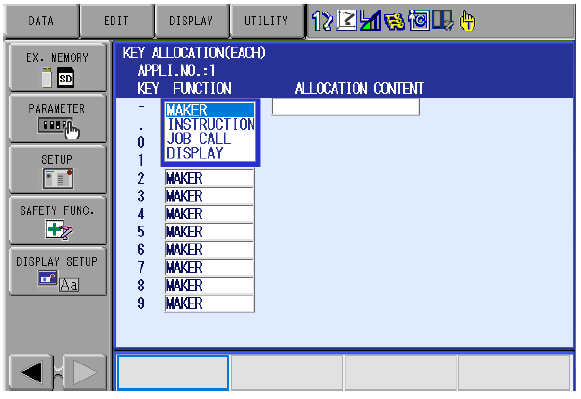
Within EACH you can choose an INSTRUCTION, JOB CALL, or DISPLAY.
- With INSTRUCTION you can hotkey an INFORM command that is chosen from the INFORM LIST.
- JOB CALL allows you to hotkey any job that is in the RESERVED JOB LIST, specified by the registration number.
- DISPLAY allows you to hotkey a certain display of your choosing. Bring up a menu that you wish to hotkey, and press INTERLOCK + ALLOCATED KEY.
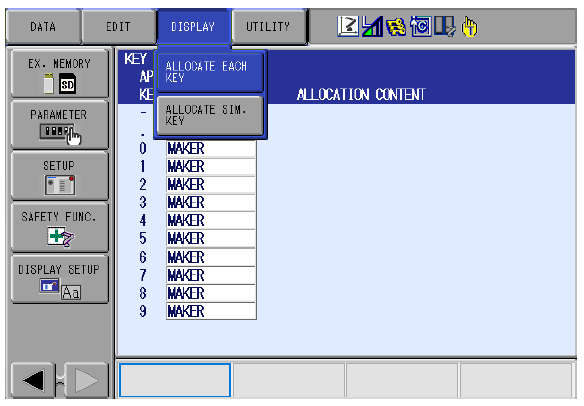
Pressing DISPLAY while in the Key Allocation menu will allow you to switch between EACH, and SIM. Just select on the display you wish to modify, and the display will change to the new allocation screen.
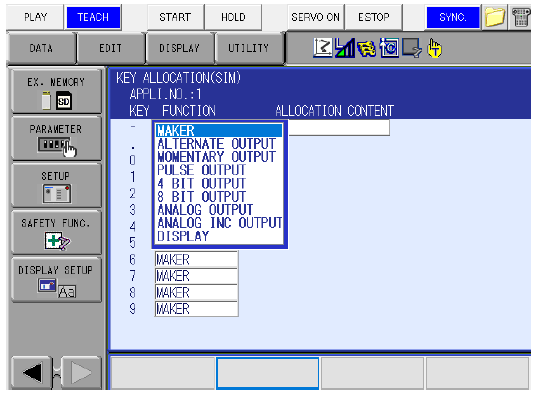
With SIM there are more options related to IO. These hotkeys will require INTERLOCK + Allocated key to be pressed for operation.
- Alternate Output-Turns on/off the specified General-Purpose output.
- Momentary Output-Turns on the specified General-Purpose output.
- Pulse Output-Turns on the specified General-Purpose output for the specified period.
- 4 Bit/8 Bit Output-Sends the specified General-Purpose group output signals.
- Analog Output-Sends the specified voltage to the specified output port.
- Analog Incremental Output-Sends the voltage increased by the specified value to the specified output port.
If you have an external axis or a base track, you can also set the Jog Keys on the pendant for easier programming. Jog Key Allocation is under SETUP.

Once inside the Jog Key Allocation menu, setup of the extra axis can occur.
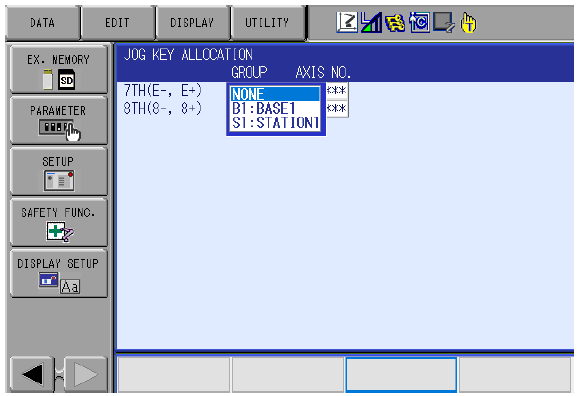
You can set the E +/-, and or the 8 +/- keys for the extra axis. When setting up you will be presented with the currently available axis selection, in this example a base axis and an external rotation axis. You will choose your group, then the axis number. Your axis number will default to 1 unless you have a base or station that has two axes of movement.
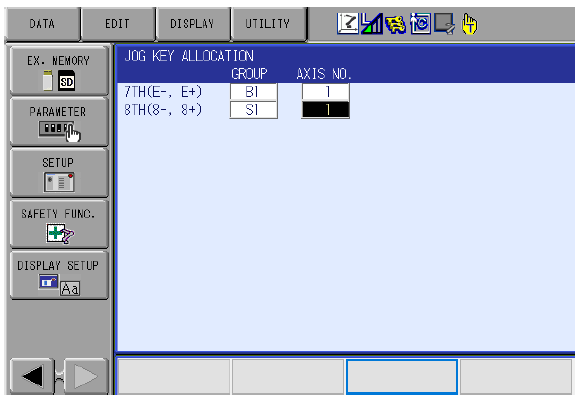
With this configuration the E +/- keys will jog my base track, and 8+/- will jog the external axis. This can be a useful tool to make programming faster, and more efficient.
*NOTE: If the axis is NOT in the jobs control group, any change of motion will NOT be recorded in the job. The base is the exception as the controller adds this to the R1 control group by default. If you have an R1 job and you jog S1, the new position of S1 will NOT be recorded as it is not in the control group. And R1+S1 job would be required to record the S1 position.
Comments
0 comments
Please sign in to leave a comment.