Introduction
This document describes how to recover from a “Check Position” message on the bottom of the pendant, as shown below.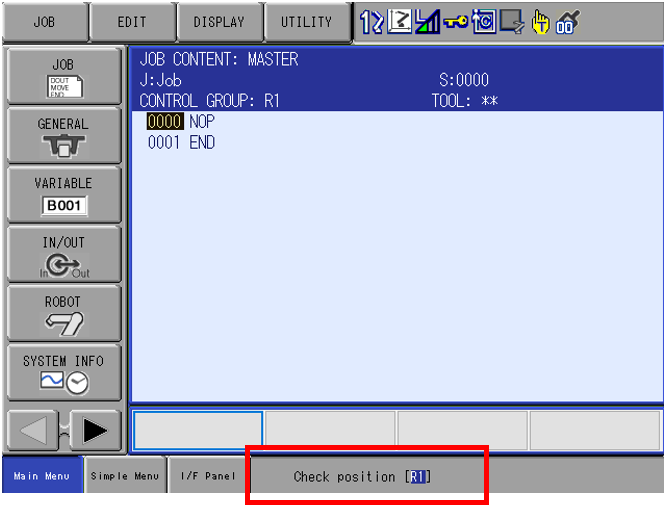
Recovery Procedure
NOTE: This procedure can be completed in any security level with no outstanding alarms.
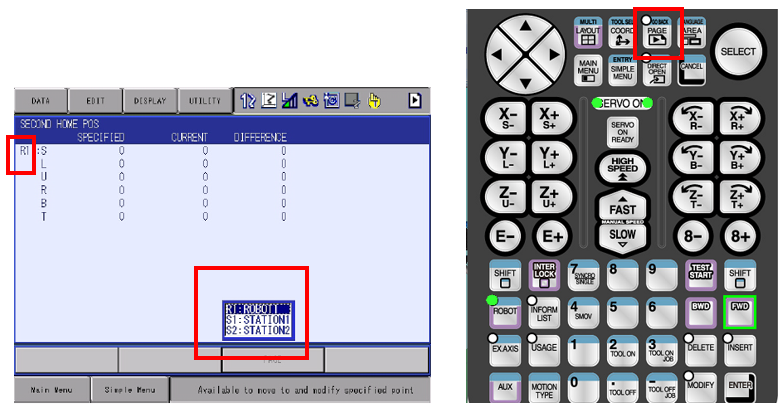
- Select ROBOT and then SECOND HOME POS.
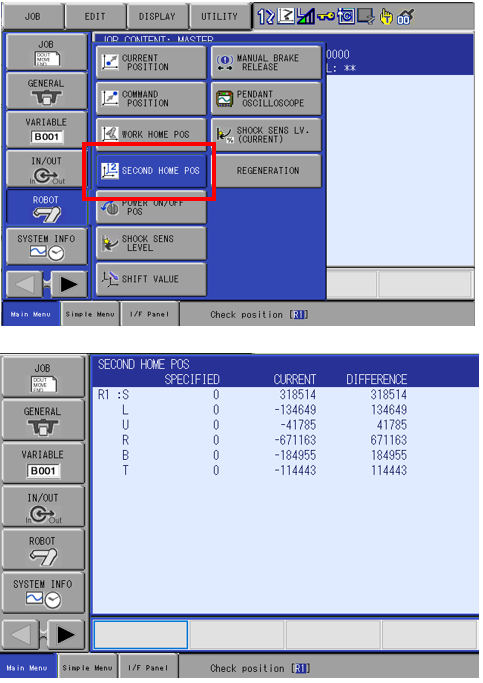
- Default SPECIFIED position “0” in column. The orientation of robot/station will vary based upon model.
- SPECIFIED position can be modified if needed to accommodate for cell layout
- If this is a single robot without an external axis, skip to step 5. Controllers with multiple groups(robot(s) and/or station(s)), continue to step 3.
- Confirm origin of Check position, highlighted in message.
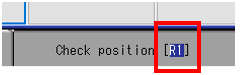
- Use the PAGE icon on the lower screen or the teach pendant PAGE key to select the group highlighted in the message.
- Selected group shows in top left corner
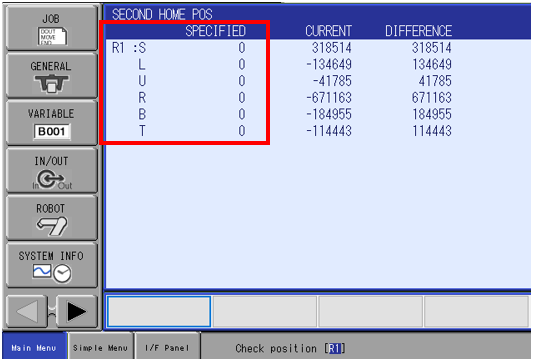
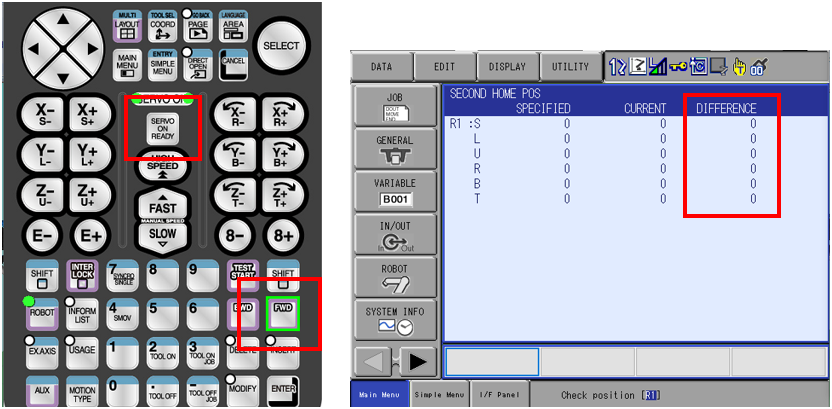
- Engage servos and hold the FWD key until robot DIFFERENCE column reads all “0”
- Robot will move to SPECIFIED position.
- Use caution when moving the robot. Be aware of possible interference.
- Manual JOINT jogging may be required to avoid interferences to complete motion to the SPECIFIED position
- Cartesian motion (Robot, User, and Tool) may not work with Check position message
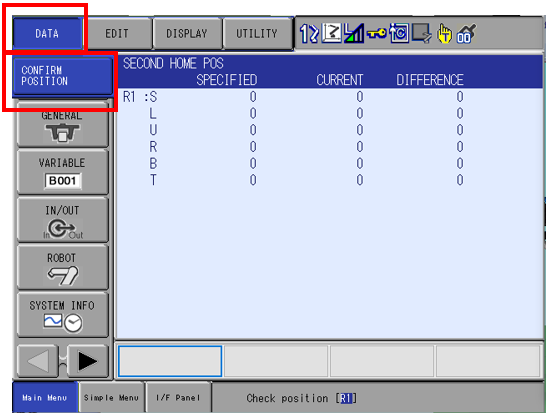
- Press DATA in top left of display screen and CONFIRM POSITION
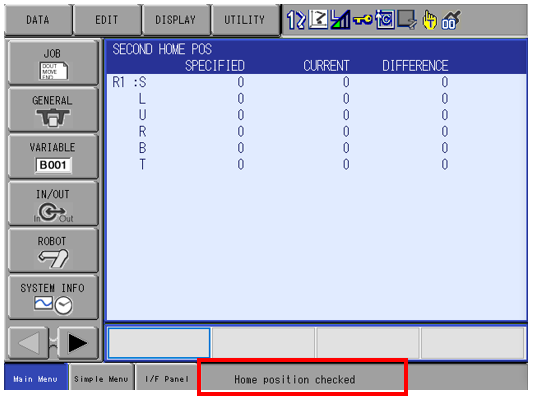
- The Check position message will change to Home Position checked. If the Check Position message remains, multiple groups may need confirmed. Repeat steps with remaining group(s) requiring position check.
You can also check out a how to video below that will walk you through this procedure.
Comments
0 comments
Please sign in to leave a comment.