Overrun/Shock Sensor Alarm Recovery
Introduction
It is common in many welding applications to have a collision on the robot between the welding torch and tooling or fixture. When this happens you often with generate a “Shock Sensor Action” alarm. This normally closed circuit built into the controller, runs through the robot out to the clutch of the torch. The purpose of this circuit is to help prevent minimum damage during a robot collision. This document will help walk a user on how to overcome the shock sensor alarm and jog the robot to a safe position.
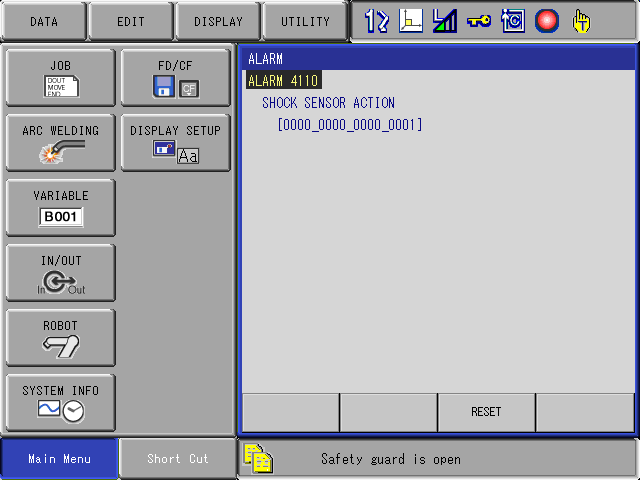
- If system is alarmed out with an overrun/shock sensor alarm, the following alarm will be displayed on the pendant screen.
- Check the following conditions first before resetting the alarm:
- Check robot’s position to see if shock sensor is tripped due to cables wrapping tightly around the arm.
- Check to see if the mounting bracket from the shock sensor clutch to the weld torch has been moved from the correct position in which the weld torch is straight out from where the cable plugs into the clutch.
- If the bracket has moved, push on the bracket towards the position it should be in till you see it pop back in place.
- Check to see if the weld torch has been pressed against the part or tooling tightly causing the shock sensor to trip out.
- If everything looks ok and correct, try to reset the alarm, and see if it clears on its own.
- If the alarm keeps coming back, please check the above again before trying to recover from the alarm to find out what is causing the shock sensor to trip out. If the robot is clear of everything (parts, cleaner, tooling, etc..) and the alarm will not reset, the orange cable from the shock sensor may have gone bad and may need to be replaced.
- On a system with multiple robots and or external axis’ (stations/positioners) make sure the pendant is in “SINGLE JOB MODE” before moving the robot by pressing the “FWD” or “BWD” or “INTERLOCK+TEST START” keys.
- To change between “SINGLE” and “MULTIPLE” job mode perform the following:
a. Turn the teach pendant mode selector switch to “TEACH”
b. Press the “PAGE” key on the teach pendant till you find the corresponding job that is currently being run by the robot that caused the alarm.
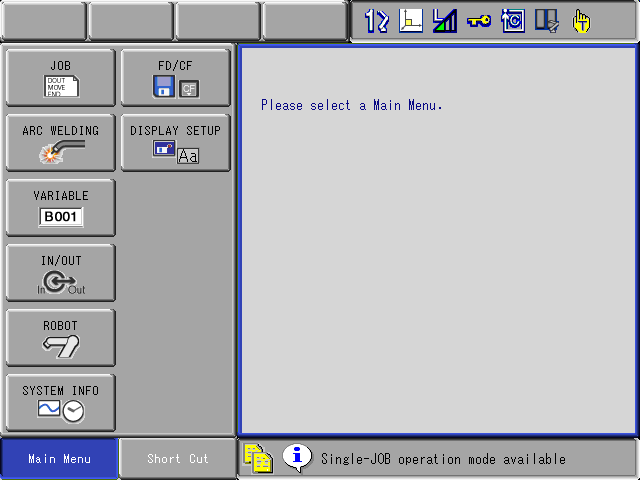
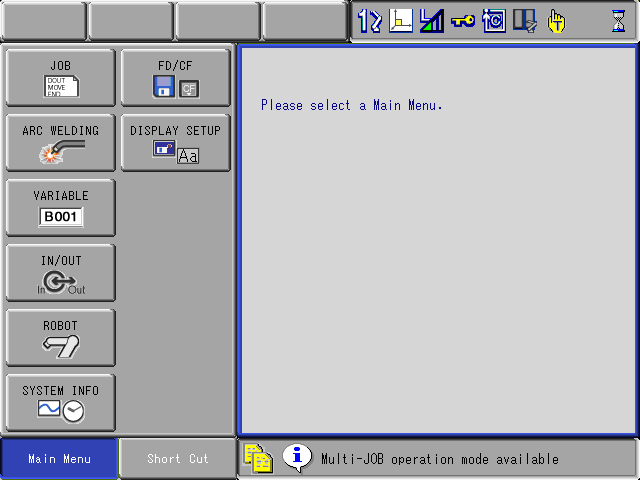
c. Press the “SHIFT+4” keys to see which mode the controller is now in. In the message display window at the bottom of the display screen on the pendant will see 1 of the 2 messages shown on the following page.
- Multi-JOB mode allows the controller to process multiple jobs at the same time through use of “PSTART” commands. Once the jobs have been started and you press the “FWD”, “BWD”, or “INTERLOCK+TEST START” keys all jobs will be processing so multiple robots and or stations/positioners may be moving when only trying to move one of them. For that reason, we recommend changing to “Single-JOB mode” when trying to recover a specific robot from an alarm.
- Single-JOB operation mode available:
- Multi-JOB operation mode available:
- Perform the following actions to recover:
a. Change security level from operation to either editing or management level.
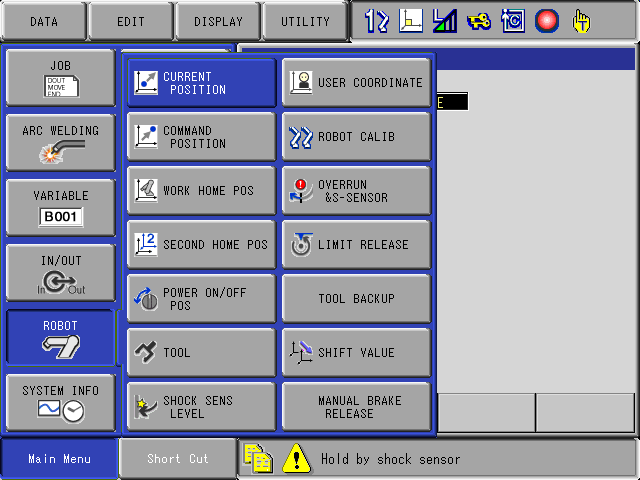
b. Once security level has been changed press “ROBOT” on the main menu area of the pendant screen.
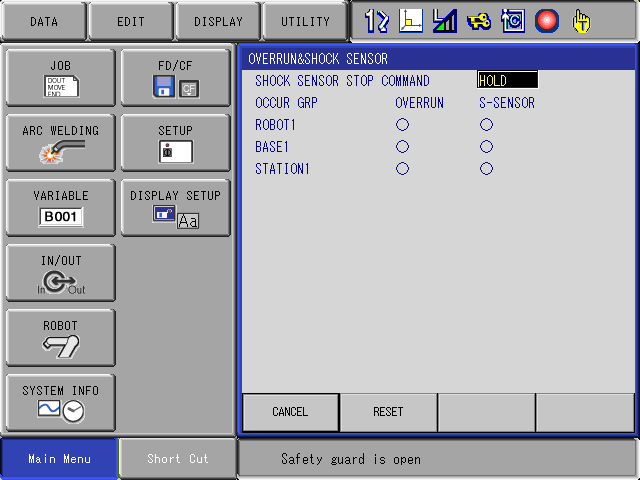
c. Press “OVERRUN&S-SENSOR” button.
d. After pressing the “OVERRIN&S-SENSOR” button the follow screen will display.

e. Press “RELEASE” on the display window to release the soft limits for the shock sensor and overrun sensor
-
-
- Overrun sensor are typically used on systems where the robot is mounted to a base track and are located at each end of the base track to prevent the base from going out to far on the track.
-
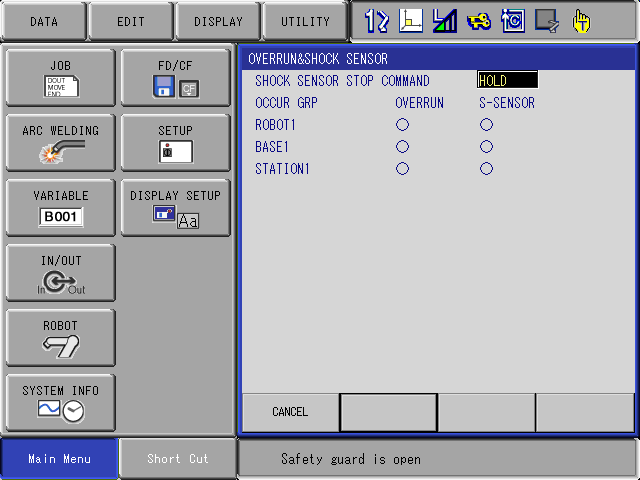
f. Press “RESET” to reset the alarm
- Once the alarm is reset the darkened circles will now be cleared and so will the alarm and you can now move the robot.
g. With the alarm reset and cleared you can now move the robot.
- You must remain within the display screen to keep the alarmed cleared until the robot is free of whatever the weld torch has been pressed tightly against to trip the shock sensor.
- If you change screens such as go back to the job the controller was currently running when the crash took place, the system will alarm out again and the robot will not be free to move away from the crash point.
5. Once the robot is free and clear of the crash zone, inspect the weld torch, tip, nozzle, and shock sensor for correct weld torch mounting bracket location.
- After checking everything over, press the “JOB” button on the main menu.
- Press “JOB” on the display menu screen.
- This will return you back to the job the robot was in prior to the crash for restarting.
- Will need to find appropriate starting position in the job where the robot stopped at to restart the system.
- If the system alarmed out again once the robot was free of everything and you returned to the JOB screen, refer to bullet point 2 at the top of this document for conditions to check. If the problem persists, contact Motoman, Inc. service department for more guidance to help assist you with getting your system up and running again.
Comments
0 comments
Please sign in to leave a comment.